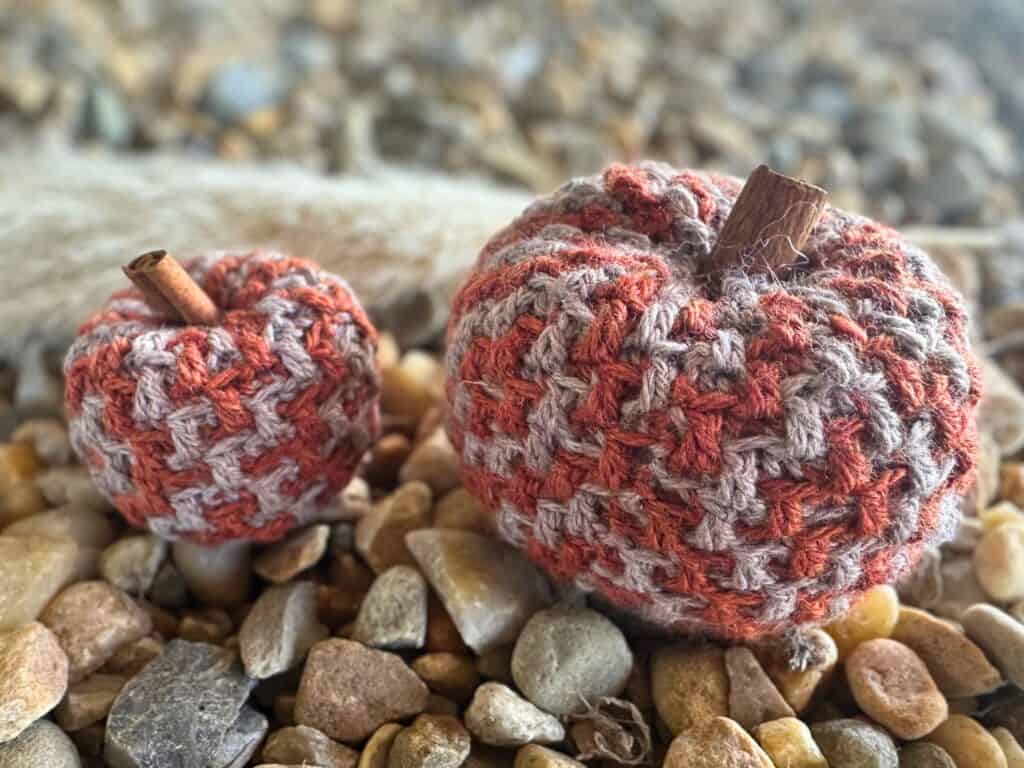
Argyle Pumpkins – Free Overlay Mosaic Crochet Pattern
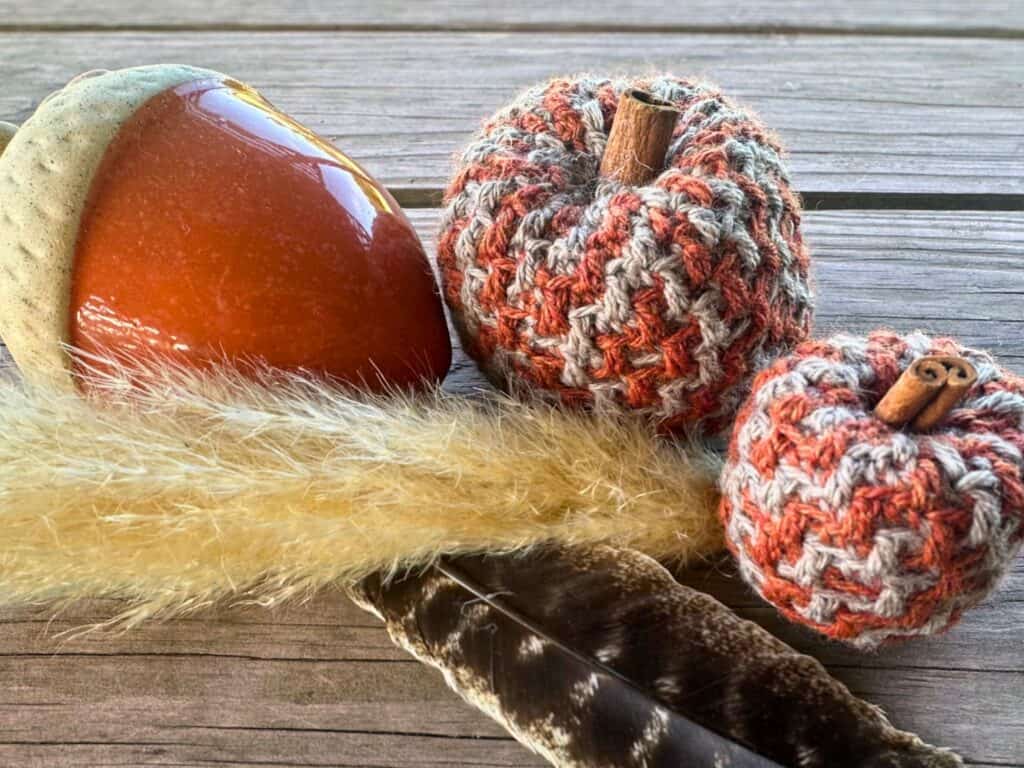
In three different sizes, with a gorgeous diamond design and a light scent of cinnamon, these Argyle Mosaic Crochet Pumpkins are a perfect project for Halloween, Thanksgiving, and the entire harvest season! Use these stuffed pumpkins as an eye-catching centerpiece or as a heartfelt gift to share with friends and loved ones.

The Mosaic Argyle Pumpkins are made in overlay mosaic crochet. This is one of my favorite stitches, and one that you’ll find in lots of my patterns! In this method, some stitches drop down over the row below to create intricate-looking designs, using only one color at a time.
You’ll be working these pumpkins with mosaic crochet in rounds. Even though you’re changing colors every row, you’ll have very few ends to weave in. Instead of fastening off after each round, you can to drop the non-working yarn to the inside of the pumpkin and pick up the new color.
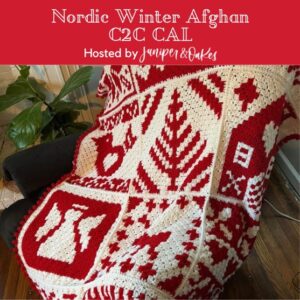
These little pumpkins work up quickly and would make a great intro into the world of mosaic crochet. Once you master the technique, you’ll be able to take on any of my other mosaic crochet patterns. Check out all of them here.
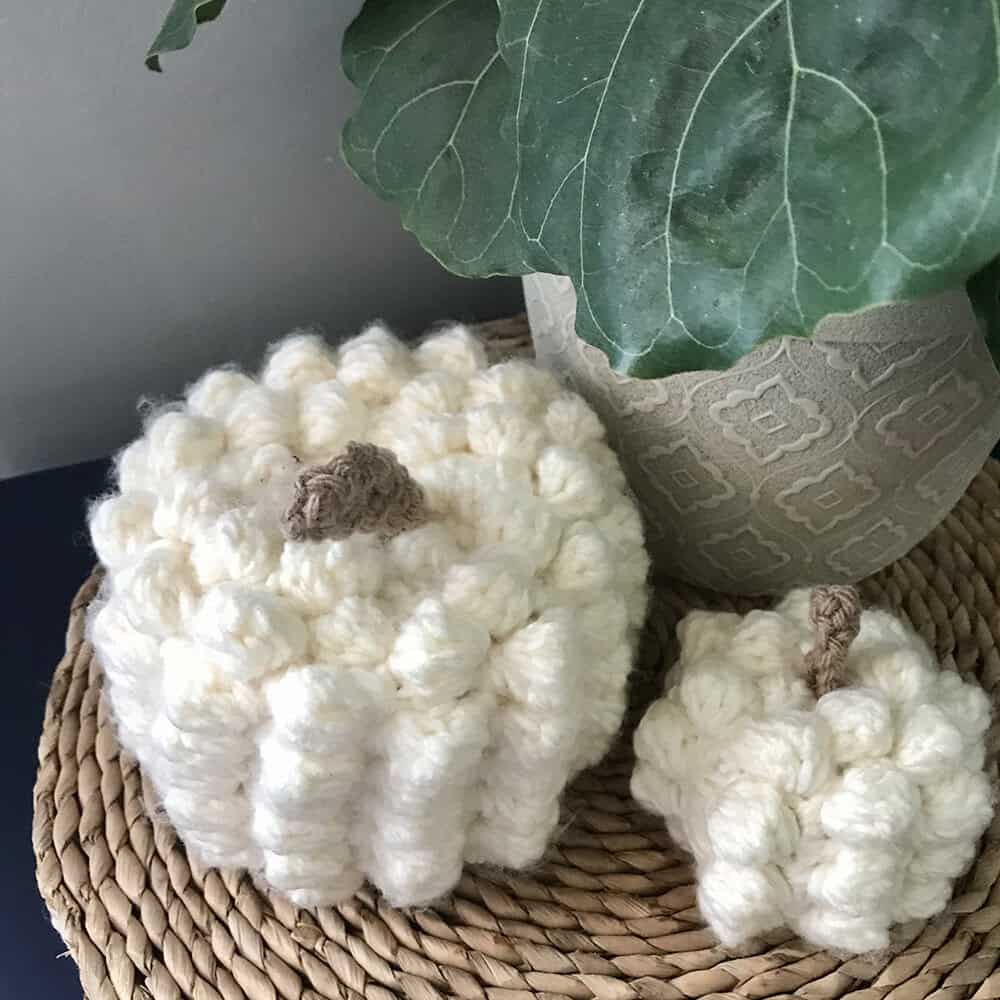
More Crochet Pumpkin Patterns
If you love to crochet cozy fall decor, you might also like these other textured pumpkins, also free on the blog:


Pattern Details for the Mosaic Crochet Argyle Pumpkins
This free mosaic crochet pattern includes written instructions and a chart for three sizes of pumpkins—2.5, 4, 5.5 inches. If you’d like to make a different size of pumpkin, you can start with any stitch multiple of 8.
The construction of these pumpkins is simple. Essentially, you’ll be crocheting a short tube that you’ll stuff with Polyfil and gather to close at each end. Pop in a cinnamon stick for an easy stem that also adds warm, spicy, nostalgic fall scent.
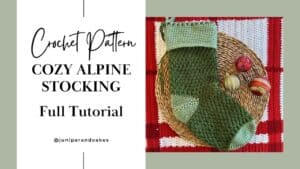
If you don’t have a cinnamon stick you could also use a short piece of tree branch. Or you could also crochet a stem, like the one used for the Cozy Alpine Pumpkin.
The Yarn
For the Mosaic Argyle Pumpkins, I used Berocco Vintage DK. This light weight (#3) yarn is a super soft blend of acrylic, wool, and nylon that’s machine washable. Vintage DK comes in dozens of colors. One is appropriately called “Pumpkin,” which I used in my sample, along with “Oats.” But you have lots of options so you can choose one to match the holiday or your home’s color story.
Even the largest pumpkin only uses a small amount of yarn. So this pattern is an excellent crochet stash buster to use up any DK weight yarn you may already have.
Purchase this yarn here

The Hook
The hook I used to work up this pattern was a G+/4.5mm. A favorite style of hook that I use and recommend are Furls Streamline Metal Hooks. The ergonomic shape of these hooks feels great in my hand. I can crochet for hours without palm or wrist pain. And they have a smooth finish, so the yarn glides across them beautifully. If you’re looking to treat yourself, I suggest you purchase one and try it out!
We all crochet a little differently, so you may find a G+ hook doesn’t work for you. That’s OK! It’s always a good idea to make a swatch using the yarn & hook of your choice so you will have a better idea of your tension and the size of your finished project. Since these pumpkins are stuffed, choose a hook that gives you a tight, dense fabric where the Polyfil won’t leak out.
Purchase A Furls Hook Here
What is Overlay mosaic crochet?
To successfully complete this project, you’ll need to be familiar with mosaic crochet. If you’ve never heard of the technique before, that’s okay! Let me break it down for you.
Overlay Mosaic Crochet is a technique that requires you to work in the BLO (back loop only) and then drop down to pick up the front loop of stitches from lower rows which creates textured stitches that lay over the stitches from previous rows and can be used to create wonderfully intricate patterns.
These patterns are worked in one direction only, fastening off the working yarn at the end of each row, and beginning again at the beginning of the piece — no turning involved. Each new row consists of only ONE color, but with the use of the sc and drop down dc stitches, you get the mosaic design. Most overlay mosaic patterns come with a chart. The symbols on the chart tell you when to use a dc and when to use the special drop down dc.
It seems complicated, but I promise, it’s super easy (and addictive) as you go. Not only that, but once you master overlay mosaic crochet, you’ll be able to create many of the most popular designs on this blog.
Visit this blog post for a basic overview of the technique
Feel free to watch the video below to familiarize yourself a bit with the technique. **Note that the sample in this video is worked flat, whereas the Mosaic Argyle Pumpkins are worked in the round. The beginning and end of the rounds will be slightly different but the technique is the same.
Please SUBSCRIBE to my channel, comment that you joined in from the Mosaic in a Month CAL, and like the videos. Thank you so much!
Mosaic YouTube Playlist
I have created a playlist on YouTube with the videos about this CAL; more will be added as they are released. Click here to access.
Where to get the pattern for the Mosaic Crochet Pumpkins
Don’t like dealing with ads? You can purchase a printable PDF version of this pattern for free for just a few dollars from my shop (you can add it to your Ravelry pattern library from there)! You can also buy the pattern from Ravelry or Etsy, or view it on Gosadi.
Purchase the Pattern from the Juniper & Oakes Shop
OR
View the pattern below for free!
Free Pattern for the Mosaic Crochet Argyle Pumpkins
Skill Level: Adventurous Beginner/Intermediate
Materials
- Yarn: Berocco Vintage DK (100% Acrylic; 290 yds/265 m per 100g/3.5oz skein)
- or any DK #3 yarn
- Color A (Pumpkin) – 1 skein
- Color B (Oats) – 1 skein
- Size G+/4.5mm crochet hook
- Yarn needle
- Scissors
- Polyfil
- Cinnamon Stick
Gauge
19 stitches x 20 rounds = 4” x4″ square
Gauge obtained from swatch of pattern, measuring on the WS.
Finished Measurements
Small: 2.5″x2.5″, Medium: 4″x4″, Large: 5.5″x5.5″
Stitch Abbreviations (US Terminology)
- BLOsc – Back Loop Only Single Crochet
- ch – Chain
- dc – Double Crochet
- FLOdc – Front Loop Only Double Crochet
- Fsc – Foundation single crochet
- RS – Right Side
- RSC – Crab Stitch (Reverse Single Crochet)
- sc – Single Crochet
Special Stitches & techniques
BLOsc: single crochet made in the back loop of the stitch in the row below
FLOdc: double crochet made in the front loop of the stitch 2 rows below
Pattern Notes
- Stitches between *asterisks* are repeated.
- Ch 1 does not count as a stitch.
- This pattern uses the overlay mosaic technique. If unfamiliar, be sure to watch my video tutorials.
- Every round is worked in a different color. Instead of fastening off after each round, I prefer to drop the yarn on the WS (inside) and pick it back up for next time.
- Every round begins with a ch 1 as the “beginning border stitch.”
- Every round ends with sl st to the ch 1 from the beginning of the round as the “ending border stitch.”
- Each round begins with 1 border stitch (ch 1) , has a repeat of 8 stitches, and 1 border stitch (sl st) at the end.
- You may choose to repeat the pattern as many times as you wish. Make sure your foundation row is made up of any multiple of 8 stitches.
- The chart included is for a base of 8 st (plus the ch 1 & sl st)
- If you prefer to make a different size:
- Wider/Narrower: Add/subtract FSC stitches
- Taller/shorter pot: Add/subtract rounds
- Be sure to just work more or less repeats as needed.
Chart


Written Instructions for the Mosaic Argyle Pumpkins
Round 1: With Color A, FSC x24 (40, 56) (or any multiple of 8), sl st to 1st FSC to join. (ensure there are no twists in the circle)
Round 2: With Color B, BLOsc around, sl st to join.
Round 3: With Color A, ch 1, *BLOsc x2, FLOdc, BLOsc x3, FLOdc, BLOsc*, repeat around, sl st to ch 1 to join.
Round 4: With Color B, ch 1, *BLOsc, [FLOdc, BLOsc x2] x 2, FLOdc*, repeat around, sl st to ch 1 to join.
Round 5: With Color A, ch 1, *FLOdc, BLOsc x2, FLOdc, BLOsc, FLOdc, BLOsc x2*, repeat around, sl st to ch 1 to join.
Round 6: With Color B, ch 1, *BLOsc x2, FLOdc, BLOsc x3, FLOdc, BLOsc*, repeat around, sl st to ch 1 to join.
Round 7: With Color A, ch 1, *BLOsc, [FLOdc, BLOsc x2] x 2, FLOdc*, repeat around, sl st to ch 1 to join.
Round 8: With Color B, ch 1, *FLOdc, BLOsc x2, FLOdc, BLOsc, FLOdc, BLOsc x2*, repeat around, sl st to ch 1 to join.
Round 9: With Color A, ch 1, *BLOsc x2, FLOdc, BLOsc x3, FLOdc, BLOsc*, repeat around, sl st to ch 1 to join.
Round 10: With Color B, ch 1, *BLOsc, [FLOdc, BLOsc x2] x 2, FLOdc*, repeat around, sl st to ch 1 to join.
Round 11: With Color A, ch 1, *BLOsc x2, FLOdc, BLOsc x3, FLOdc, BLOsc*, repeat around, sl st to ch 1 to join.
Round 12: With Color B, ch 1, *FLOdc, BLOsc x2, FLOdc, BLOsc, FLOdc, BLOsc x2*, repeat around, sl st to ch 1 to join.
Round 13: With Color A, ch 1, *BLOsc, [FLOdc, BLOsc x2] x 2, FLOdc*, repeat around, sl st to ch 1 to join.
Round 14: With Color B, ch 1, *BLOsc x2, FLOdc, BLOsc x3, FLOdc, BLOsc*, repeat around, sl st to ch 1 to join.
Round 15: With Color A, ch 1, *FLOdc, BLOsc x2, FLOdc, BLOsc, FLOdc, BLOsc x2*, repeat around, sl st to ch 1 to join.
Round 16: With Color B, ch 1, *BLOsc, [FLOdc, BLOsc x2] x 2, FLOdc*, repeat around, sl st to ch 1 to join. (Small : skip to assembly.)
Round 17: With Color A, ch 1, *BLOsc x2, FLOdc, BLOsc x3, FLOdc, BLOsc*, repeat around, sl st to ch 1 to join.
Round 18: With Color B, ch 1, *FLOdc, BLOsc x2, FLOdc, BLOsc, FLOdc, BLOsc x2*, repeat around, sl st to ch 1 to join.
Round 19: With Color A, ch 1, *BLOsc x2, FLOdc, BLOsc x3, FLOdc, BLOsc*, repeat around, sl st to ch 1 to join.
Round 20: With Color B, ch 1, *BLOsc, [FLOdc, BLOsc x2] x 2, FLOdc*, repeat around, sl st to ch 1 to join.
Round 21: With Color A, ch 1, *FLOdc, BLOsc x2, FLOdc, BLOsc, FLOdc, BLOsc x2*, repeat around, sl st to ch 1 to join.
Round 22: With Color B, ch 1, *BLOsc x2, FLOdc, BLOsc x3, FLOdc, BLOsc*, repeat around, sl st to ch 1 to join.
Round 23: With Color A, ch 1, *BLOsc, [FLOdc, BLOsc x2] x 2, FLOdc*, repeat around, sl st to ch 1 to join.
Round 24: With Color B, ch 1, *FLOdc, BLOsc x2, FLOdc, BLOsc, FLOdc, BLOsc x2*, repeat around, sl st to ch 1 to join.
Round 25: With Color A, ch 1, *BLOsc x2, FLOdc, BLOsc x3, FLOdc, BLOsc*, repeat around, sl st to ch 1 to join. (Medium: skip to assembly)
Round 26: With Color B, ch 1, *BLOsc, [FLOdc, BLOsc x2] x 2, FLOdc*, repeat around, sl st to ch 1 to join.
Round 27: With Color A, ch 1, *BLOsc x2, FLOdc, BLOsc x3, FLOdc, BLOsc*, repeat around, sl st to ch 1 to join.
Round 28: With Color B, ch 1, *FLOdc, BLOsc x2, FLOdc, BLOsc, FLOdc, BLOsc x2*, repeat around, sl st to ch 1 to join.
Round 29: With Color A, ch 1, *BLOsc, [FLOdc, BLOsc x2] x 2, FLOdc*, repeat around, sl st to ch 1 to join.
Round 30: With Color B, ch 1, *BLOsc x2, FLOdc, BLOsc x3, FLOdc, BLOsc*, repeat around, sl st to ch 1 to join.
Round 31: With Color A, ch 1, *FLOdc, BLOsc x2, FLOdc, BLOsc, FLOdc, BLOsc x2*, repeat around, sl st to ch 1 to join.
Round 32: With Color B, ch 1, *BLOsc, [FLOdc, BLOsc x2] x 2, FLOdc*, repeat around, sl st to ch 1 to join.
Assembly
- With yarn needle, weave tail along one edge around.
- Pull the tail tight to close the pumpkin.
- Sew yarn across the cinch in a couple different directions to reinforce closure.
- Fasten off and leave tail on inside of pumpkin.
- Stuff pumpkin with Polyfil.
- Repeat steps 1-2 on 2nd side, but before hole is completely closed, insert Cinnamon stick, then cinch tight. Repeat step 3.
- To give more shape & indent the pumpkin: push yarn needle down through the center of the pumpkin, pull tight, and weave from top to bottom 5 times.
- Tie a knot, and weave in the end.
Ready, Set… CROCHET!
Action Items:
- Work up the Mosaic Argyle Pumpkins
- Post a picture of your finished pumpkin(s) in the J&O FB Group
- If you have any issues, questions, or tips, please post them on the J&O FB Group as well.
Definitely post pictures and share about your project on any social media you have. When you make this scarf, be sure to tag me @juniperandoakes and use #juniperandoakes so we can see your progress!
Yarnsgiving
The Mosaic Argyle Pumpkins pattern is featured as part of Yarnsgiving, an event hosted by the Craft Yarn Council during fall 2025. This event celebrates “the joy of handmade giving and the spirit of the season.” The CYC invites crafters to create meaningful handmade gifts to share with others during the holiday season.
To inspire you, the CGOA (Crochet Guild of America) has partnered with different talented designers to bring you bonus project ideas. You can see all those crochet designs, including mine, here.

Definitely post pictures and share about Yarnsgiving on any social media you have. When you make these pumpkins, be sure to tag me @juniperandoakes and use #juniperandoakes so we can see your progress!
The Fine Print
This pattern and its images are the property of Juniper and Oakes ©2024. The pattern is for your personal use only. Please do not copy/paste, distribute, or alter and claim as your own. You may sell products made by this pattern, but please credit @juniperandoakes and remember to link back to juniperandoakes.com or credit Juniper & Oakes on the craft fair tag.
You may post pictures on social media and tag @juniperandoakes and use the hashtag #juniperandoakes. If you make this pattern, please email a picture to [email protected] and I will include it in a gallery on my website. You can also post pictures on my Facebook Page, or in the Juniper + Oakes Crochet Community Facebook Group.
This post may contain affiliate links. View our disclosure policy here.
Let me know if you run into a problem. I respond quickly and will help any way I can to clarify any confusion or challenging stitches.