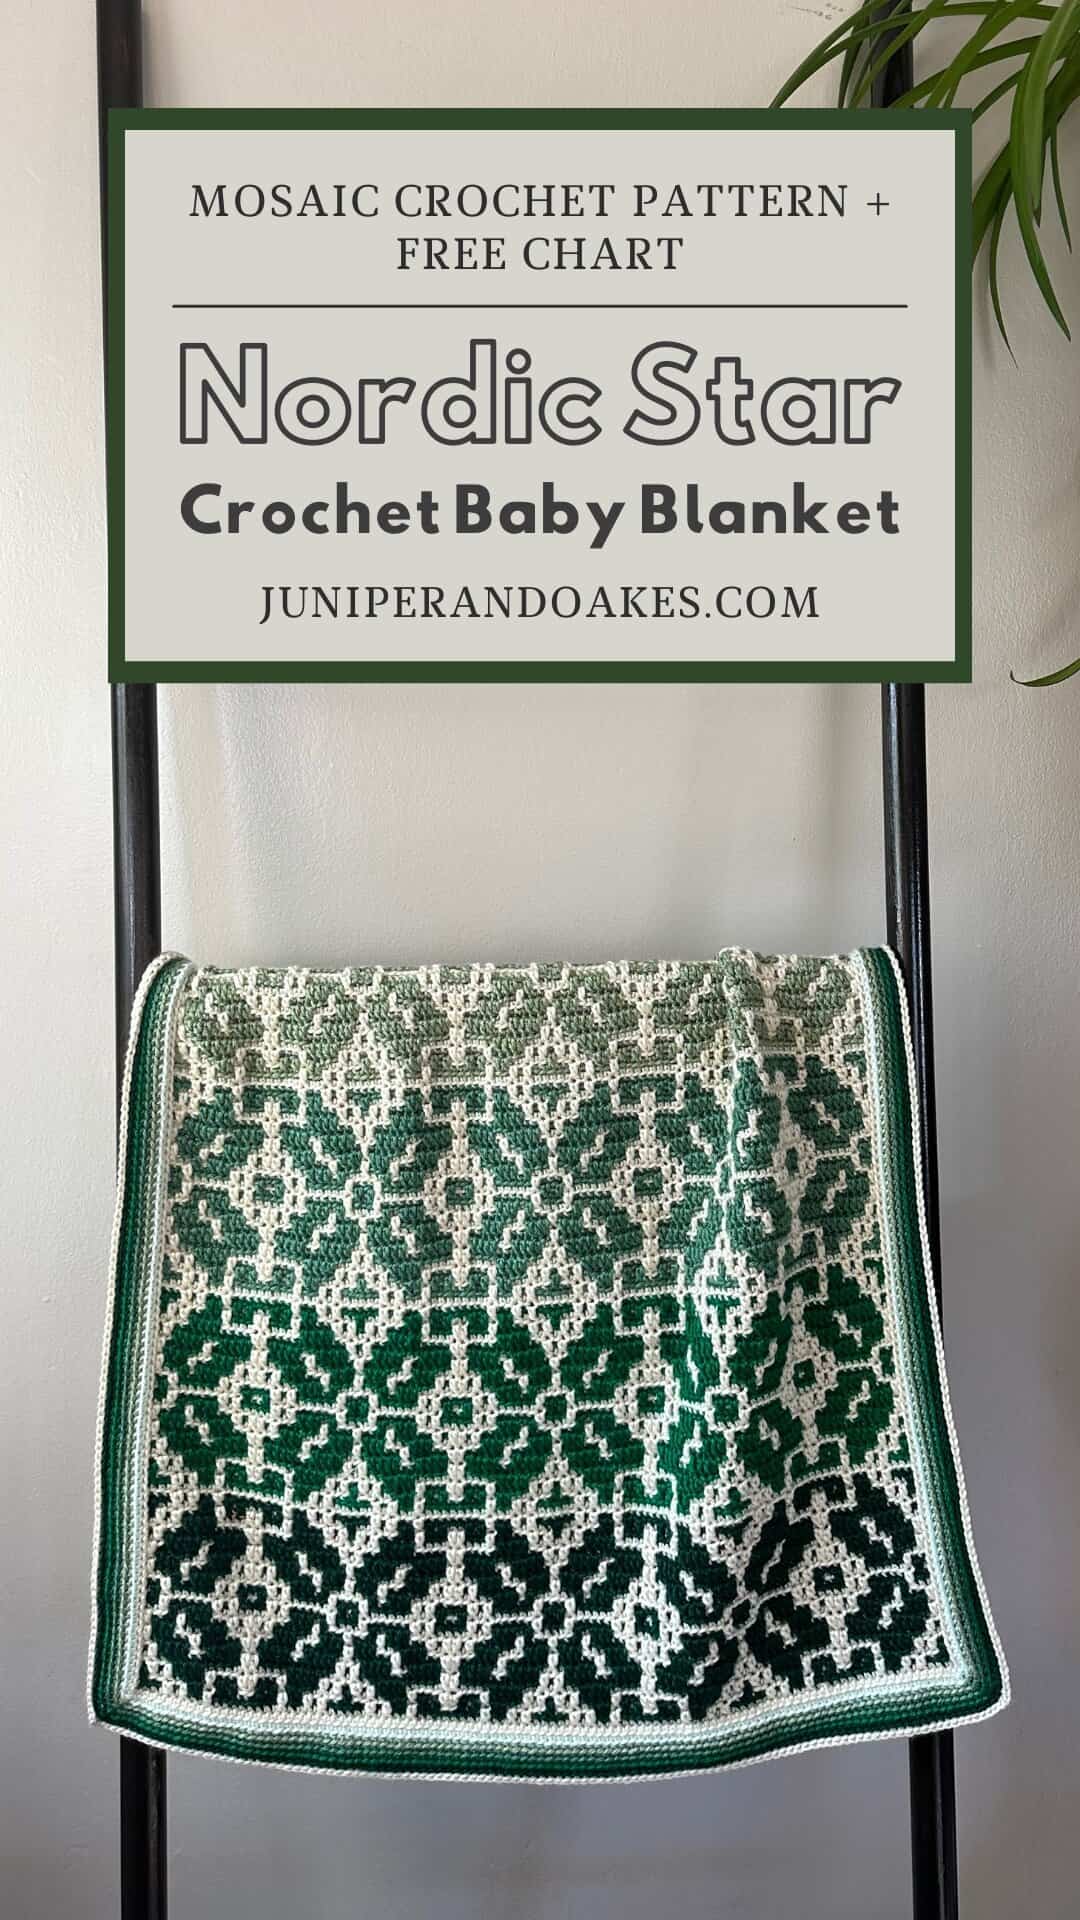
Nordic Star Baby Blanket – Free Mosaic Crochet Pattern
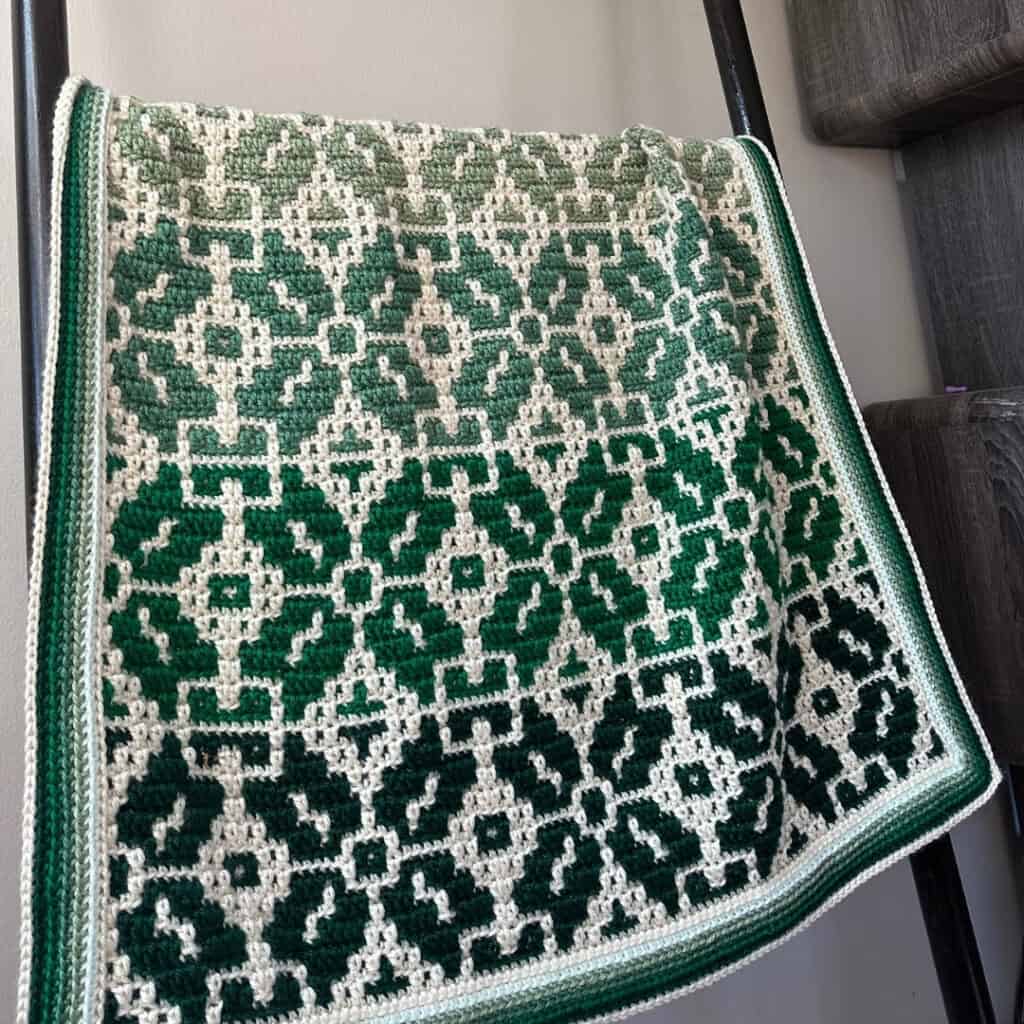
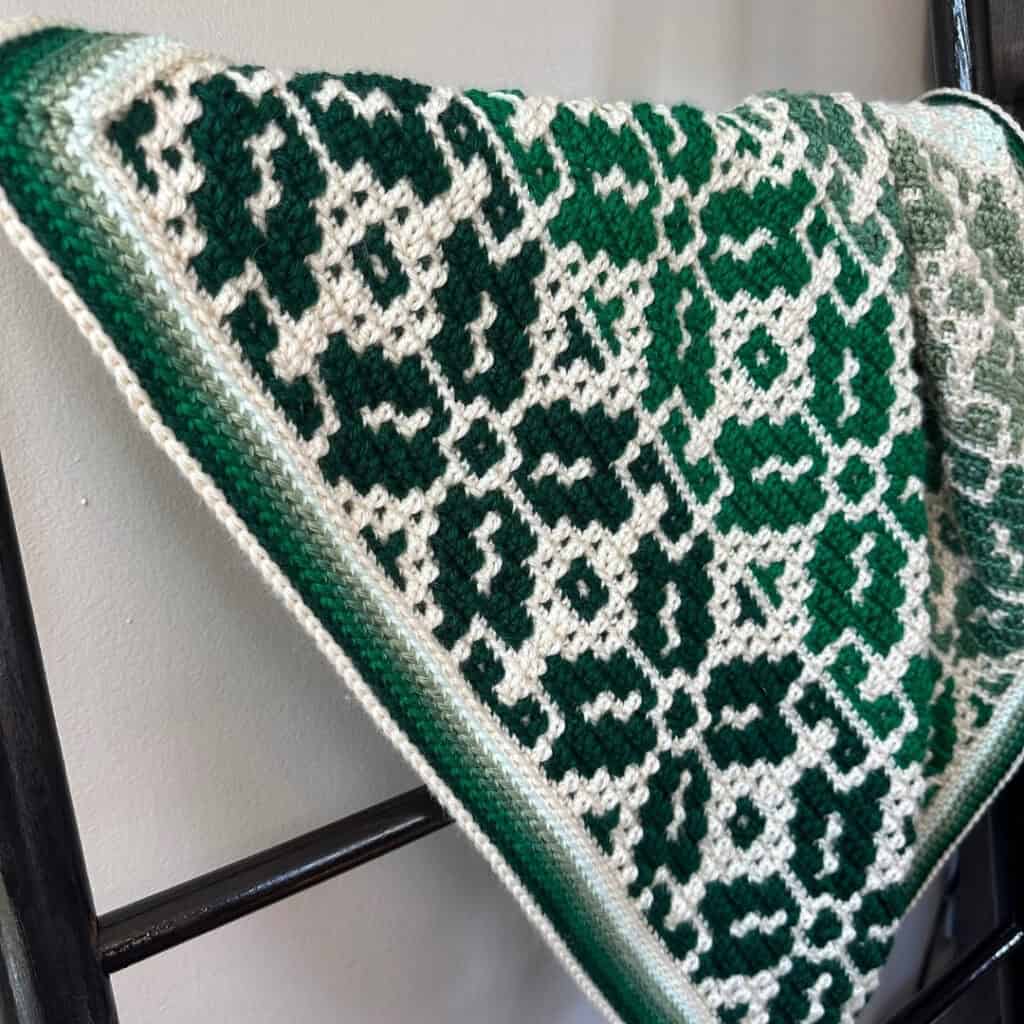
Wrap your special little one in cozy comfort with the Nordic Star Baby Blanket. This mosaic crochet baby blanket has a timeless Nordic charm that feels just right for baby’s first Christmas—but it’s also classic enough to use all year long. A beautiful handmade gift filled with warmth and love.
Worked in overlay mosaic crochet, this intricate looking design is deceptively easy to create, using just one color at a time! Get the free chart and written instructions below and get started creating some holiday magic.
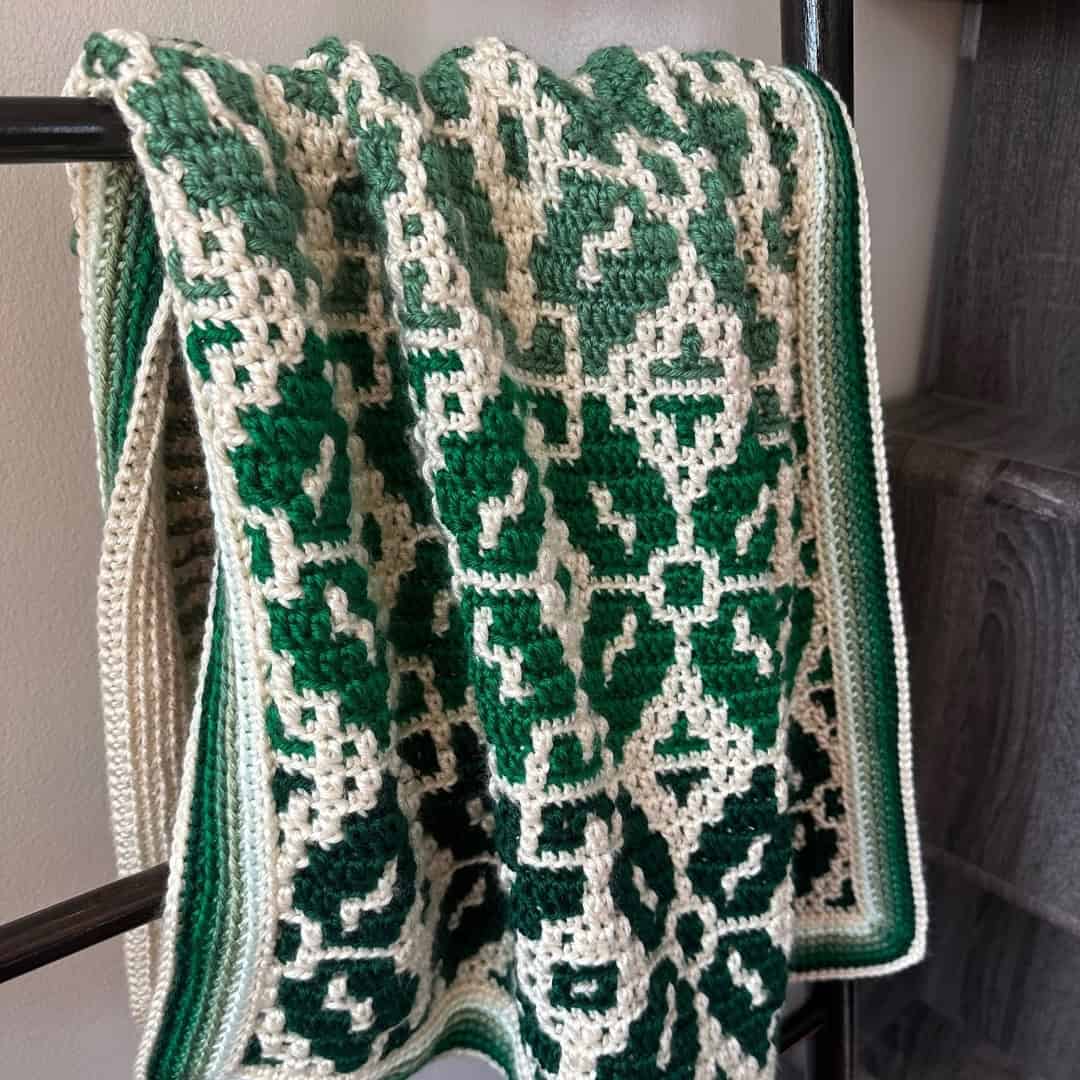
This mosaic crochet baby blanket is just one of several Nordic Star patterns I have designed! This popular collection includes a throw, a Christmas stocking, and a scarf. I wanted to showcase this stunning mosaic crochet design in a smaller form, perfectly sized for babies. Now, you can bring the same nostalgic wintry goodness to your nursery!
Don’t have time to make this now? Pin the image below for later.
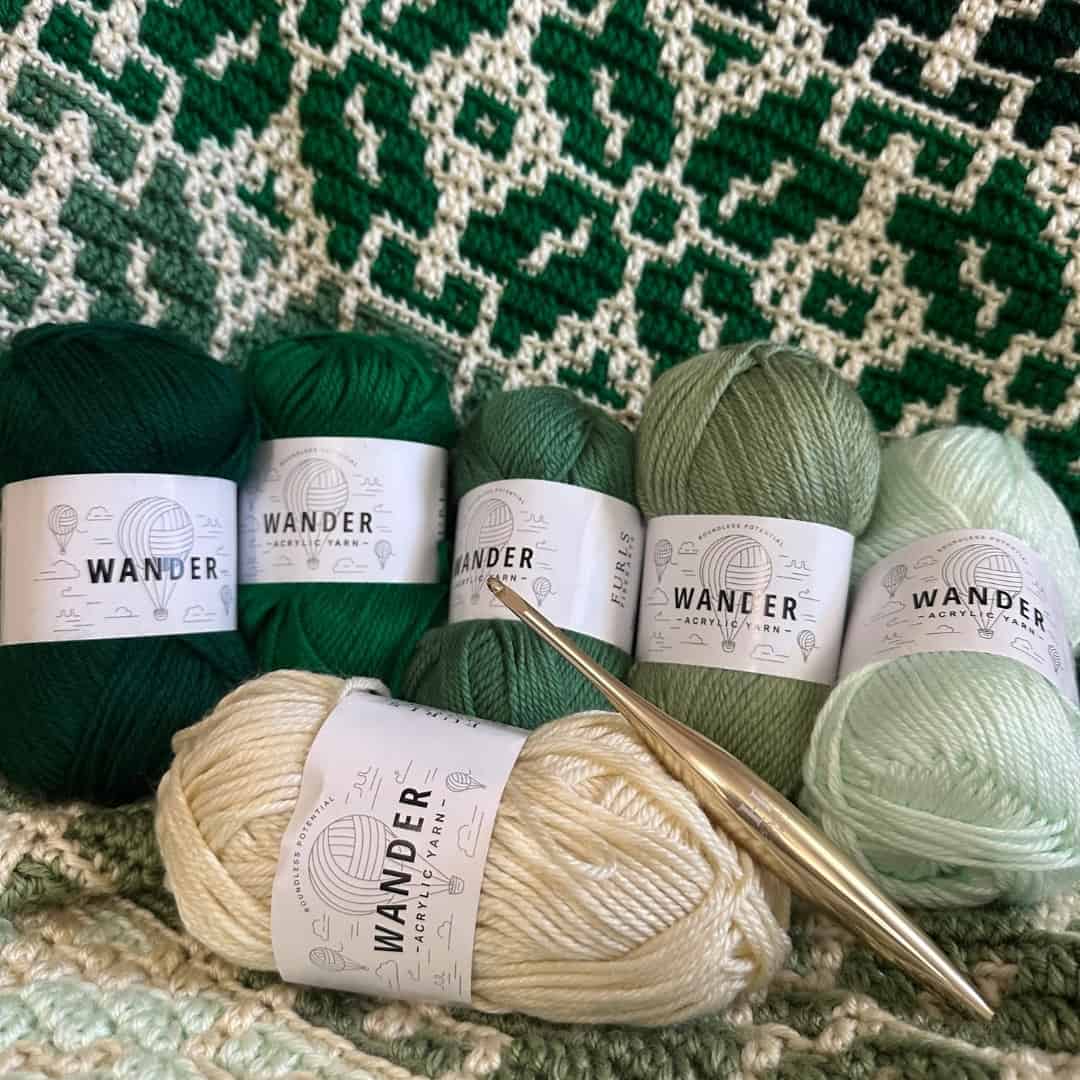
The Yarn
For the Nordic Star Mosaic Crochet Baby Blanket, I used Wander acrylic yarn from Furls Crochet. This yarn was provided to me for use in the 2025 Furls Blog Hop. With its amazingly soft and shiny texture, Wander is a favorite of mine that I’ve used in several designs. Unfortunately, this yarn has been discontinued. However, you can substitute any worsted weight (#4) yarn.
I chose one main color (cream), along with five different shades of green. The greens progress from dark to light, creating an ombre effect. This blanket would also look fabulous worked in a self-striping cake yarn. Or make it a stash-busting crochet project and see what fun color combos you can come up with!
The Hook
The hook I used to work up this pattern was an H/5.0mm Streamline Metal hook from Furls Crochet. I love the way these Streamline Hooks feel in my hand and how the yarn glides across the smooth metal finish.
Furls provided me with this particular Streamline hook to use for the 2025 Furls Blog Hop. However, I own several Furls hooks and use them frequently. If you’ve never used a Furls hook, I definitely recommend you try one.
**Note: Furls is always coming out with fun new limited edition hooks, in beautiful colors, all with the same comfortable ergonomic shape. Check out their whole line of Streamline Metal Hooks and see the latest products!
We all have our own crochet style. So it’s OK if you prefer something other than an H hook. No matter what, it’s a good idea to make a swatch using the yarn & hook of your choice. That will give you a better idea of your tension and the size of your finished blanket.
Purchase A Furls Hook Here
What is Overlay mosaic crochet?
To successfully complete this blanket, you’ll need to be familiar with mosaic crochet. If you’ve never heard of the technique before, that’s okay! Let me break it down for you.
Overlay Mosaic Crochet is a technique that requires you to work in the BLO (back loop only) and then drop down to pick up the front loop of stitches from lower rows which creates textured stitches that lay over the stitches from previous rows and can be used to create wonderfully intricate patterns.
These patterns are worked in one direction only, fastening off the working yarn at the end of each row, and beginning again at the beginning of the piece — no turning involved. Each new row consists of only ONE color, but with the use of the sc and drop down dc stitches, you get the mosaic design. Most overlay mosaic patterns come with a chart. The symbols on the chart tell you when to use a dc and when to use the special drop down dc.
It seems complicated, but I promise, it’s super easy (and addictive) as you go. Not only that, but once you master overlay mosaic crochet, you’ll be able to create many of the most popular designs on this blog.
Visit this blog post for a basic overview of the technique
Feel free to watch the video below to familiarize yourself a bit with the technique.
Please SUBSCRIBE to my channel, comment that you joined in from the Nordic Star Baby Blanket, and like the videos. Thank you so much!
Mosaic YouTube Playlist
I have created a playlist on YouTube with the videos about overlay mosaic crochet; more will be added as they are released. Click here to access.
Interested in my other Mosaic Crochet patterns?
The Nordic Star Baby Blanket is just one of dozens of gorgeous mosaic crochet patterns available from Juniper & Oakes—everything from blankets, to accessories, to cozy home decor. Find your next mosaic crochet project here!
Where to get the pattern for the Nordic Star Baby Blanket
Don’t like dealing with ads? You can purchase a printable PDF version of this pattern for free for just a few dollars from my shop! You can also buy the pattern from Ravelry or Etsy, or view it on Gosadi.
Purchase the Pattern from the Juniper & Oakes Shop
OR
View the pattern below for free!
Free Pattern for the Nordic Star Mosaic Crochet Baby Blanket
Skill Level: Adventurous Beginner/Intermediate
Materials
- Yarn: Any #4/worsted weight yarn in 6 colors)
- Appx 700 yards of Color A
- Appx 120 yards of Colors B-F
- Size H/5mm crochet hook
- Yarn needle
- Scissors
Gauge
14 Stitches x 17 Rows in 4″ x 4″ square
Finished Measurements
28 inches x 33 inches
Stitch Abbreviations (US Terminology)
- BBS – Beginning Border Stitch
- BLOsc – Back Loop Only Single Crochet
- ch – Chain
- EBS – Ending Border Stitch
- FLOdc – Front Loop Only Double Crochet
- Fsc – Foundation single crochet
- lp – Loop
- RS – Right Side

Special Stitches & techniques
BLOsc: single crochet made in the back loop of the stitch in the row below
FLOdc: double crochet made in the front loop of the stitch 2 rows below
Beginning Border Stitch (BBS) A standing sc through the post (or the ‘v’) of the stitch below, ensuring that both legs of the stitch on the WS are to the outside of the blanket. (For right-handed crocheters the legs would be secured to the right of the stitch and vice versa for left-handed crocheters.)
Ending Border Stitch (EBS) A sc through the post (or the ‘v’) of the stitch, ensuring that both legs of the stitch on the WS are to the outside of the blanket. (Similar to BBS, but the back legs of the stitch are secured to the opposite side.)
Pattern Notes
- This pattern uses the overlay mosaic technique. If unfamiliar, be sure to read this blog post with the basics.
- The chart for the pattern is included.
- Pattern is worked from right to left on Right Side only, from the bottom up.
- Every row is worked in a different color.
- You may choose to make your Foundation Row the traditional way by chaining, then adding your sc on top. Be sure to make one additional chain than the number of stitches needed for your project.
Mosaic Crochet Chart for the Nordic Star Baby Blanket
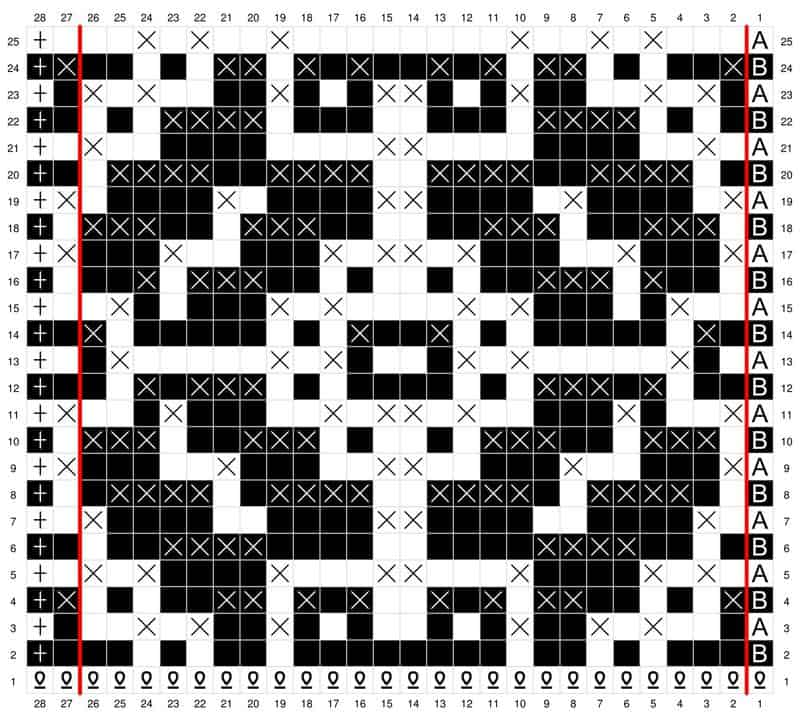

Written Instructions for the Nordic Star Mosaic Crochet Baby Blanket
Row 1: With Color A, FSC 103 (or any multiple of 50 +3).
Row 2: With Color B, BBS in 1st, BLOsc across, EBS in last.
Row 3: With Color A, BBS in 1st, *BLOsc x3, FLOdc x1, BLOsc x1, FLOdc x1, BLOsc x2, FLOdcx1, BLOsc x8, FLOdc x1, BLOsc x2, FLOdc x1, BLOsc x1, FLOdc x1, BLOsc x2*, repeat across, BLOsc x1, EBS in last.
Row 4: With Color B, BBS in 1st, *FLOdc x1, BLOsc x5, FLOdc x2, BLOsc x1, FLOdc x1, BLOsc x1, FLOdc x1, BLOsc x2, FLOdc x1, BLOsc x1, FLOdc x1, BLOsc x1, FLOdc x2, BLOsc x5*, repeat across, FLOdc x1, EBS in last.
Row 5: With Color A, BBS in 1st, *BLOsc x1, FLOdc x1, BLOsc x1, FLOdc x1, BLOsc x4, FLOdc x1, BLOsc x3, FLOdc x2, BLOsc x3, FLOdc x1, BLOsc x4, FLOdc x1, BLOsc x1, FLOdc x1*, repeat across, BLOsc x1, EBS in last.
Row 6: With Color B, BBS in 1st, *BLOsc x4, FLOdc x4, BLOsc x10, FLOdc x4, BLOsc x3*, repeat across, BLOsc x1, EBS in last.
Row 7: With Color A, BBS in 1st, *BLOsc x1, FLOdc x1, BLOsc x10, FLOdc x2, BLOsc x10, FLOdc x1*, repeat across, BLOsc x1, EBS in last.
Row 8: With Color B, BBS in 1st, *BLOsc x2, FLOdc x4, BLOsc x2, FLOdc x4, BLOsc x2, FLOdc x4, BLOsc x2, FLOdc x4, BLOsc x1*, repeat across, BLOsc x1, EBS in last.
Row 9: With Color A, BBS in 1st, *FLOdc x1, BLOsc x5, FLOdc x1, BLOsc x5, FLOdc x2, BLOsc x5, FLOdc x1, BLOsc x5*, repeat across, FLOdc x1, EBS in last.
Row 10: With Color B, BBS in 1st, *BLOsc x1, FLOdc x3, BLOsc x3, FLOdc x3, BLOsc x6, FLOdc x3, BLOsc x3, FLOdc x3*, repeat across, BLOsc x1, EBS in last.
Row 11: With Color A, BBS in 1st, *FLOdc x1, BLOsc x3, FLOdc x1, BLOsc x5, FLOdc x1, BLOsc x1, FLOdc x2, BLOsc x1, FLOdc x1, BLOsc x5, FLOdc x1, BLOsc x3*, repeat across, FLOdc x1, EBS in last.
Row 12: With Color B, BBS in 1st, *BLOsc x3, FLOdc x1, BLOsc x1, FLOdc x3, BLOsc x10, FLOdc x3, BLOsc x1, FLOdc x1, BLOsc x2*, repeat across, BLOsc x1, EBS in last.
Row 13: With Color A, BBS in 1st, *BLOsc x2, FLOdc x1, BLOsc x5, FLOdc x1, BLOsc x1, FLOdc x1, BLOsc x4, FLOdc x1, BLOsc x1, FLOdc x1, BLOsc x5, FLOdc x1, BLOsc x1*, repeat across, BLOsc x1, EBS in last.
Row 14: With Color B, BBS in 1st, *BLOsc x1, FLOdc x1, BLOsc x9, FLOdc x1, BLOsc x2, FLOdc x1, BLOsc x9, FLOdc x1*, repeat across, BLOsc x1, EBS in last.
Row 15: With Color A, BBS in 1st, *BLOsc x2, FLOdc x1, BLOsc x5, FLOdc x1, BLOsc x1, FLOdc x1, BLOsc x4, FLOdc x1, BLOsc x1, FLOdc x1, BLOsc x5, FLOdc x1, BLOsc x1*, repeat across, BLOsc x1, EBS in last.
Row 16: With Color B, BBS in 1st, *BLOsc x3, FLOdc x1, BLOsc x1, FLOdc x3, BLOsc x10, FLOdc x3, BLOsc x1, FLOdc x1, BLOsc x2*, repeat across, BLOsc x1, EBS in last.
Row 17: With Color A, BBS in 1st, *FLOdc x1, BLOsc x3, FLOdc x1, BLOsc x5, FLOdc x1, BLOsc x1, FLOdc x2, BLOsc x1, FLOdc x1, BLOsc x5, FLOdc x1, BLOsc x3*, repeat across, FLOdc x1, EBS in last.
Row 18: With Color B, BBS in 1st, *BLOsc x1, FLOdc x3, BLOsc x3, FLOdc x3, BLOsc x6, FLOdc x3, BLOsc x3, FLOdc x3*, repeat across, BLOsc x1, EBS in last.
Row 19: With Color A, BBS in 1st, *FLOdc x1, BLOsc x5, FLOdc x1, BLOsc x5, FLOdc x2, BLOsc x5, FLOdc x1, BLOsc x5*, repeat across, FLOdc x1, EBS in last.
Row 20: With Color B, BBS in 1st, *BLOsc x2, FLOdc x4, BLOsc x2, FLOdc x4, BLOsc x2, FLOdc x4, BLOsc x2, FLOdc x4, BLOsc x1*, repeat across, BLOsc x1, EBS in last.
Row 21: With Color A, BBS in 1st, *BLOsc x1, FLOdc x1, BLOsc x10, FLOdc x2, BLOsc x10, FLOdc x1*, repeat across, BLOsc x1, EBS in last.
Row 22: With Color B, BBS in 1st, *BLOsc x4, FLOdc x4, BLOsc x10, FLOdc x4, BLOsc x3*, repeat across, BLOsc x1, EBS in last.
Row 23: With Color A, BBS in 1st, *BLOsc x1, FLOdc x1, BLOsc x1, FLOdc x1, BLOsc x4, FLOdc x1, BLOsc x3, FLOdc x2, BLOsc x3, FLOdc x1, BLOsc x4, FLOdc x1, BLOsc x1, FLOdc x1*, repeat across, BLOsc x1, EBS in last.
Row 24: With Color B, BBS in 1st, *FLOdc x1, BLOsc x5, FLOdc x2, BLOsc x1, FLOdc x1, BLOsc x1, FLOdc x1, BLOsc x2, FLOdc x1, BLOsc x1, FLOdc x1, BLOsc x1, FLOdc x2, BLOsc x5*, repeat across, FLOdc x1, EBS in last.
Row 25: With Color A, BBS in 1st, *BLOsc x3, FLOdc x1, BLOsc x1, FLOdc x1, BLOsc x2, FLOdc x1, BLOsc x8, FLOdc x1, BLOsc x2, FLOdc x1, BLOsc x1, FLOdc x1, BLOsc x2*, repeat across, BLOsc x1, EBS in last.
Rows 26 – 121: Repeat Rows 2-25 with remaining colors, Switching colors after each repeat.
Back Border
Round 1: With Color A, sc in the FLO of any stitch along the bottom of blanket, sc in FLO in each stitch. In each corner, *sc in FLO, ch 1, sc in FLO*. Along the side, sc through both legs of the border stitches. Invisible join to first stitch. (see below)
Round 2: Ch 1, BLOsc in each stitch around. In each corner, *BLOsc, ch-1, BLOsc* in each corner. Invisible join to first stitch.
Rounds 3-6: Repeat Round 2. Fasten off.

Front Border
Round 1: With Color A, Repeat Round 1 of Back Border.
Round 2-6: Switching to Colors B-F each round, Repeat Round 2 of Back Border.

Finishing
- Secure ends by tying two together along each side.
- Trim ends to about 1inch in length.
- With Color A, BLOsc through BOTH borders. (The loops that are closest together on the blanket), ensuring that the ends are enclosed in the envelope border.
- Fasten off.
- Weave in (or hide) all ends.
Ready, Set… CROCHET!
Action Items:
- Work up the Nordic Star Baby Blanket
- Post a picture of your finished blanket in the J&O FB Group
If you have any issues, questions, or tips, please post them on the J&O FB Group as well.
Definitely post pictures and share about your project on any social media you have. When you make this blanket, be sure to tag me @juniperandoakes and use #juniperandoakes so we can see your progress!
The Furls Blog Hop 2025
I am excited to share that this pattern is featured in the 2025 Furls Blog Hop. Throughout the year, they’ve been sharing patterns from different amazing crochet designers, all created with Furls yarn and hooks. You should definitely have a look at the blog hop page and see what other great patterns you can find!
The Fine Print
This pattern and its images are the property of Juniper and Oakes ©2025. The pattern is for your personal use only. Please do not copy/paste, distribute, or alter and claim as your own. You may sell products made by this pattern, but please credit @juniperandoakes and remember to link back to juniperandoakes.com or credit Juniper & Oakes on the craft fair tag.
You may post pictures on social media and tag @juniperandoakes and use the hashtags #juniperandoakes. If you make this pattern, please email a picture to [email protected] and I will include it in a gallery on my website. You can also post pictures on my Facebook Page, or in the Juniper + Oakes Crochet Community Facebook Group.
This post may contain affiliate links. View our disclosure policy here.
Let me know if you run into a problem. I respond quickly and will help any way I can to clarify any confusion or challenging stitches.