Free Cozy Alpine Stocking Crochet Pattern
The stockings were hung by the chimney with care…but oh no! One was missing!! Whatever will we do?? I have just the thing!
A free Christmas stocking crochet pattern!
Welcome to the Cozy Alpine Stocking CAL!
I am your host Erin of Juniper & Oakes! I am so glad you are here! This is a beginner-friendly crochet pattern that features the Alpine stitch worked in the round. Included are written instructions, some pictures to help guide, and a full video tutorial.
Not able to work up this pattern right now? Pin this for later:


What is a CAL?
Perhaps you have never participated in a Crochet Along before and you may be wondering what in the world I am talking about.
A Crochet Along (CAL) is essentially an event where you crochet along with other people creating the same project. A each part of the pattern is released bit by bit, and you work at the same pace as other participants.
Here are some examples of other CALs I’ve hosted:
- A Very Bauble Christmas CAL
- Mosaic Nordic CAL
- Nordic C2C CAL
- 4th of July Pillow CAL
- Monthly Mosaic Mystery CAL
For this CAL, there are 4 sections, with one being released daily over a 4-day weekend. The first section released Friday, December 16th and the final section on the following Monday.
Rather Purchase the Complete Pattern?
Once you work up the section for that day, be sure you head over to the Juniper & Oakes Crochet Community on FaceBook to share pictures or your WIPS and complete stockings.
The patterns are all brand new & will be released daily Monday-Friday from November 28-December 9th.
Get Daily Notifications
If you want me to let you know when the next section is live, just let me know your details and I’ll send you a quick message! (I’ll be sending out these emails to my email subscribers).


Buy the Pattern on Ravelry or Etsy!
This pattern is free below, released section by section over the weekend. The complete pattern will be available for free on the blog beginning Monday, December 19th. But if you would rather have a PDF version of the complete written instructions, right away, you can purchase it on Ravelry.
Purchase it at a 50% discount now through Monday. Using code ALPINECAL.
Buy the Cozy Alpine Collection!
I currently have 5 crochet patterns featuring the Cozy Alpine Stitch.
- The Cozy Alpine Pouf
- The Cozy Alpine Bauble
- The Cozy Alpine Plant Pot Cover
- The Cozy Alpine Pumpkin
- The Cozy Alpine Stocking
Purchase the Cozy Alpine Pattern Bundle on Ravelry!
How will the CAL work?
- There will be 4 sections. A new section will be released every day from December 16th-18th come to this pattern page (right here, you did it!)
- Each new section will be added below the previous section.
- Follow the crochet pattern available & work up that day’s section.
- Post pictures in the Juniper & Oakes Crochet Community FB Page.
- Come back the next weekday for the next section.
- OR if you don’t want to wait each day or would prefer printable patterns, buy the full pattern here.


Yarn
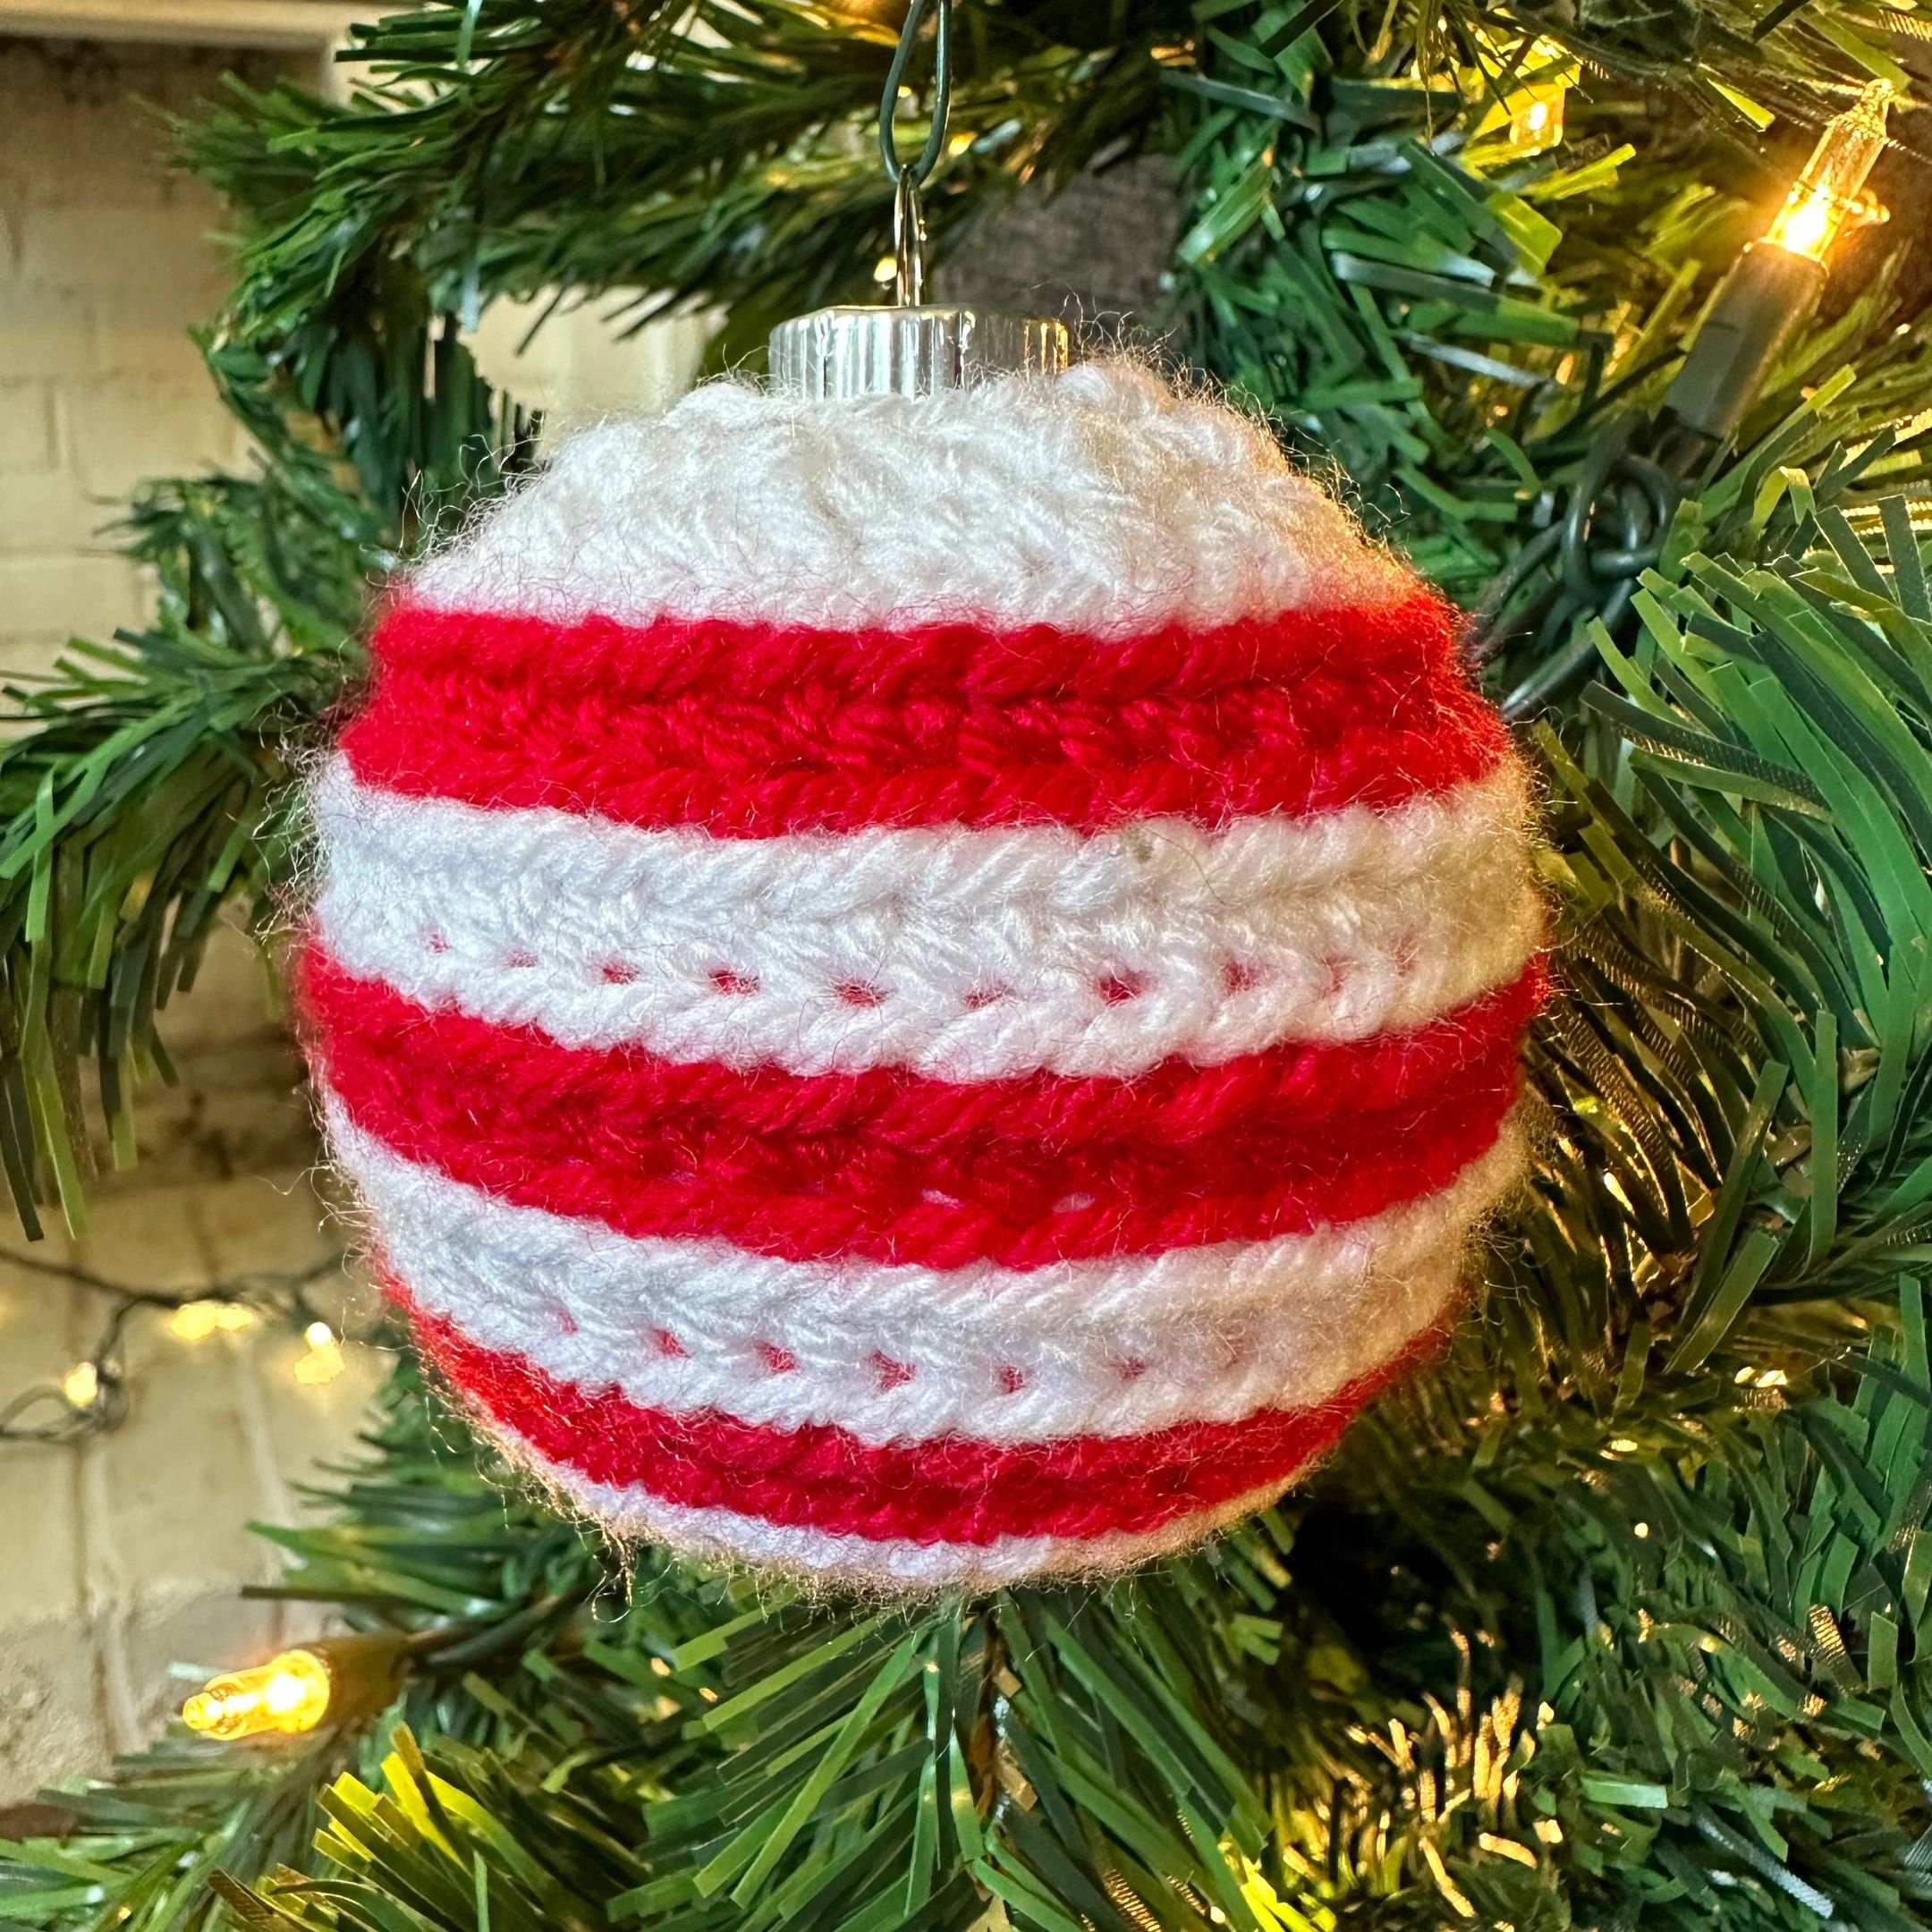
I worked up my ornament using some Vanna’s Choice yarn. I was experimenting with a different project and came up with this pattern instead!
Then I knew I wanted to turn this into a CAL with complete video instructions, so I use Wander Acrylic yarn from Furls in different shades of green. Furls gave me this yarn for this project & I am so grateful.
Both yarns used are 100% acrylic, but they each feel so different! The Vanna’s Choice feels more like a standard, yet softer basic acrylic worsted yarn. The Wander yarn acts and feels like Caron Simply soft – slippery & shiny & so soft.
I noticed that although they’re both worsted weight and I used the same hook, the stockings came out to be different sizes. I think the Wander yarn is a bit skinnier than Vanna’s Choice. Either that or my tension was a lot tighter the second time around.
Hook
I used a 5mm/H hook for this pattern. You may have to adjust your hook size based on gauge & tension.
I have this lovely green Furls Odyssey in Emerald & Nickel. I love the way this hook feels in my hands.
Cozy Alpine Stocking – Crochet Pattern
Skill Level: Advance Beginner
Materials
- Yarn: Vanna’s Choice by Lion Brand medium #4 yarn (100% acrylic; 170/156 m per 3.5 oz/100 g skein) Color A (White): 120 yards (1 skein) Color B (Red): 185 yards (2 skeins) or Wander Acrylic from Furls crochet in Patina & Meadow or Any other worsted-weight yarn in 2 colors
- Hook H/8 – 5.00 mm
- Yarn needle
- Scissors
Gauge:
Base: 9 Rounds = 4” diameter
Stitch used to obtain gauge = sc in the round (Use Rounds 1-12)
Not important, gauge will affect the size of the project and gaps between stitches
Finished Size
One Size
Stitch Abbreviations (US Terminology)
BLO – Back Loop Only
ch – Chain
dc – Double Crochet
fsc – Foundation Single Crochet
fpdc – Front Post Double Crochet
mc – Magic Circle
sc – Single Crochet
Sc2tog – Single Crochet 2 Together
sl st – Slip Stitch
sk – Skip
st – Stitch
Special Stitches
Alpine Stitch:Traditionally a 4-row repeat pattern where rows of dc and fpdc stitches are alternated with rows of sc stitches to create a beautiful textured diamond shape pattern on one side and a flat defined pattern on the other side. Because of the way this pattern is written in the round, the sc rows have been omitted and simply works alternating rows of dc/fpdc and fpdc/dc. As a rule of thumb (but not always), if the stitch below is a dc, then work a fpdc. If the stitch below is a fpdc, then work a dc.
Notes
- When a round begins with ch 1 or ch 2, the ch does not count as a st, so work the following in the 1st st.
- Stitches between *asterisks* are repeated as many times as directed.
- Stitches in (parenthesis) at the end of the round indicate the number of stitches in the round.
- Stitches separated by, commas, are made in the next stitch.
- This pattern is worked in the round. At the end of each round, do not sl st to join; instead, continue working the next round seamlessly – unless noted elsewhere in the pattern.
- Do not turn at the end of each round – unless noted elsewhere in the pattern.
- Stitch markers should be used to mark the beginning of your rounds to make it easy to find your place.
- The ch-space made in Round 29 will be the basis for the heel.
- The fsc sts made in Round 57 create a loop to hang the stocking
- By turning your work in Round 58, the sc sts are able to lay with RS showing once the cuff is folded down.
- The ridge made from working the BLO in Round 58 makes it easier to fold down the cuff.
- In each round of the heel, decrease by 4 stitches.
Toe: (PART 1)
Below is a video tutorial on the toe, followed by written instructions.
Please subscribe to my channel, like the video, and comment on what colors you’re using for your stocking.
Begin with Color A.
Make a mc.
Round 1: Work 6 sc in mc. (6 sc)
Round 2: 2 sc in 1st st and in each st around. (12 sc)
Round 3: *2 sc in 1st st, sc in next st,* repeat around. (18 sc)
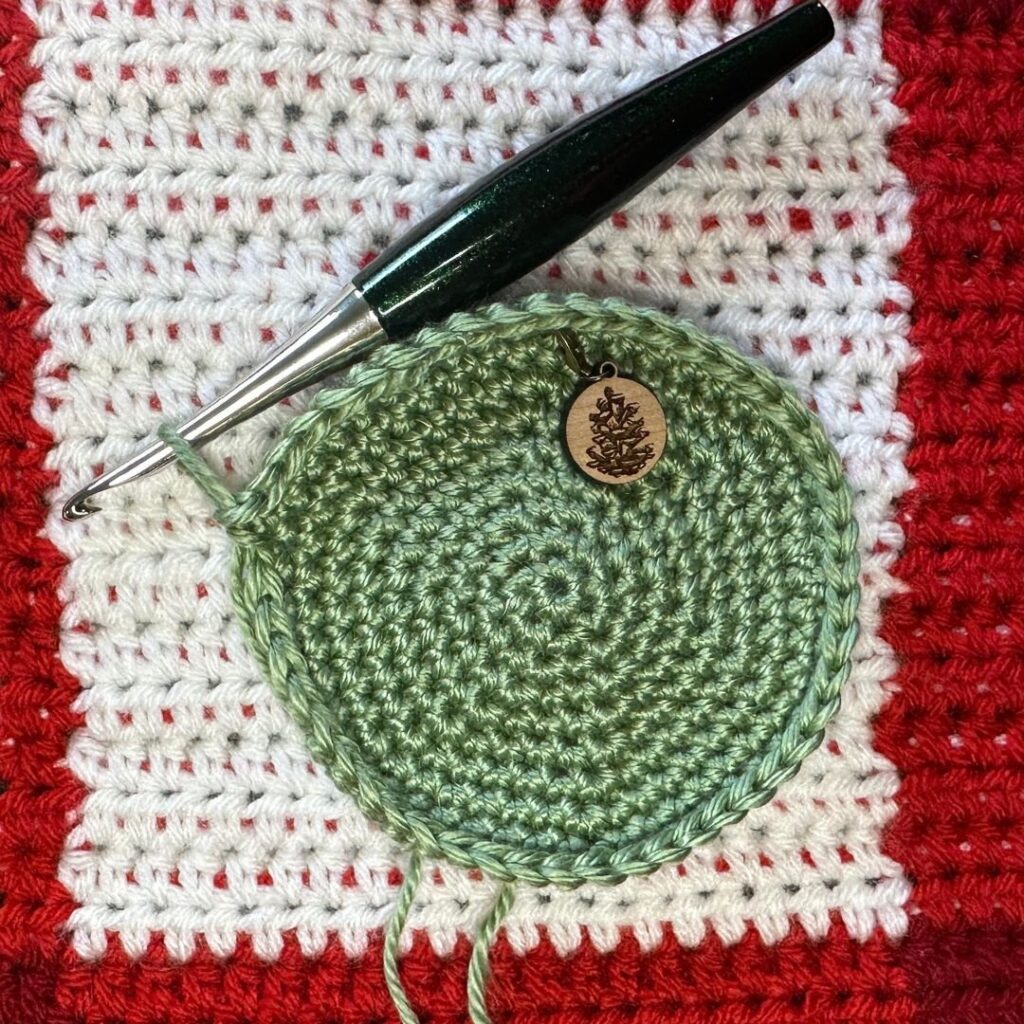

Round 4: *2 sc in 1st st, sc in next 2 st*, repeat around. (24 sc)
Round 5: *2 sc in 1st, sc in next 3 st*, repeat around. (30 sc)
Round 6: *2 sc in 1st, sc in next 4 st*, repeat around. (36 sc)
Round 7: *2 sc in 1st, sc in next 5 st*, repeat around. (42 sc)
Round 8: *2 sc in 1st, sc in next 6 st*, repeat around. (48 sc)
Rounds 9-12: Sc in each st around. (48 sc)
Place a stitch marker to hold your spot until tomorrow.
Body of Stocking: (Part 2)
Join with Color B. Fasten off Color A.
Round 13: Ch 2, dc in each st around. (48 dc)
Round 14: Ch 1, fpdc in 1st st, dc in next st, *fpdc, dc*, repeat around, sl st to 1st fpdc to join. (24 dc, 24 fpdc)
Round 15: Ch 1, dc in 1st st, fpdc in next st, *dc, fpdc*, repeat around, sl st to 1st dc to join. (24 dc, 24 fpdc)
Rounds 16-29: Repeat Rounds 14-15.


Round 30: Ch 1, fpdc in 1st st, dc in next st, *fpdc, dc*, repeat 9 times , Ch 24, sk 24 st, *Fpdc, dc* repeat 2 times, sl st to 1st fpdc to join. (12 dc, 12 fpdc, 24 ch)
Round 31: Ch 1, dc in 1st, fpdc in next st, *dc, fpdc*, repeat 9 times, dc in each ch, *dc, fpdc* repeat 2 times, sl st to 1st dc to join. (36 dc, 12 fpdc)
Round 32: Ch 1, fpdc in 1st, dc in next st, *fpdc, dc*, repeat around, sl st to 1st fpdc to join. (24dc, 24 fpdc)
Round 33:Ch 1, dc in 1st, fpdc in next st, *dc, fpdc*, repeat around, sl st to 1st dc to join. (24 dc 24 fpdc)
Rounds 34-45: Repeat Rounds 32-33.
Place a stitch marker to hold your spot until tomorrow.
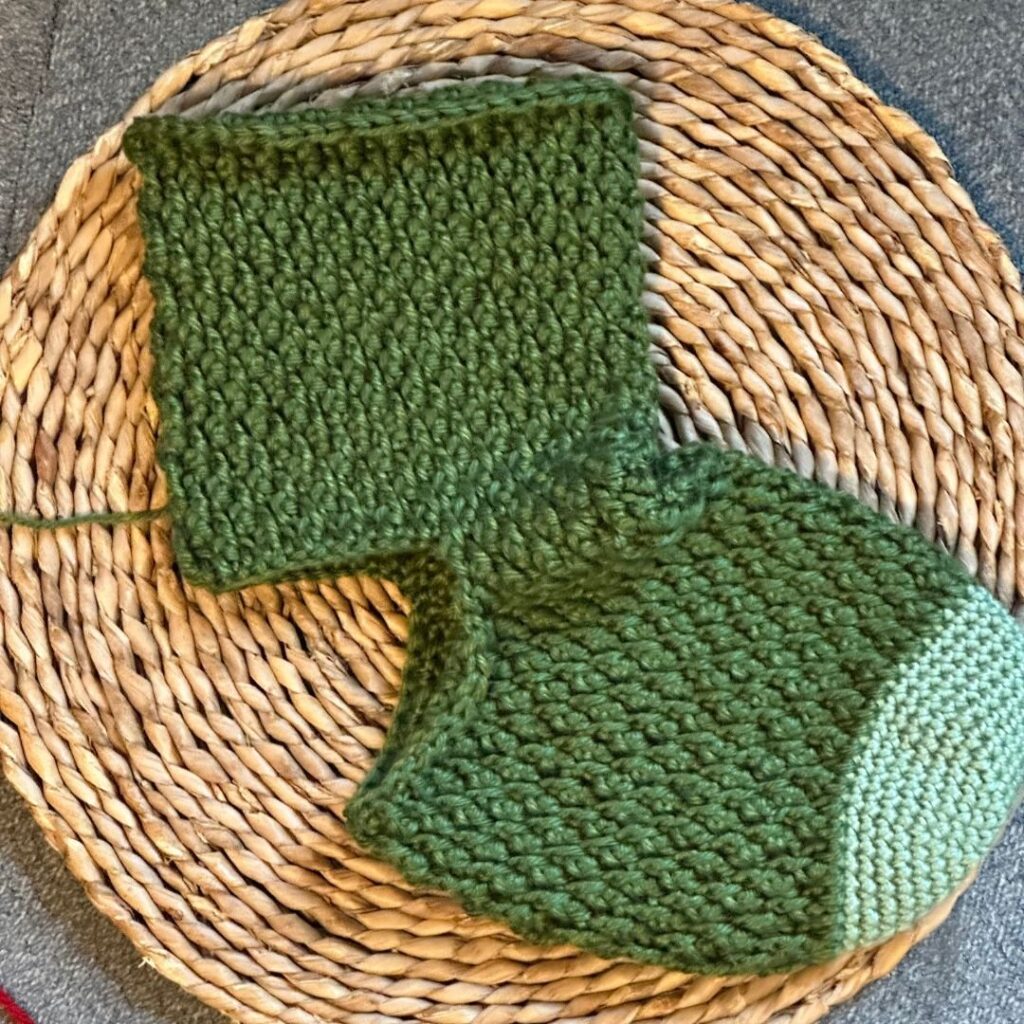

Cuff: (Part 3)
Join with Color A. Fasten off Color B.
Round 46: Sc in each st around. (48 sc)
Rounds 47- 56: Repeat Round 46.


Round 57: Sc in 1st st and in next 27 st, place a stitch marker, fsc 12 st, sl st to sc with stitch marker, sc in next st 20 st. (48 sc, 12 fsc)
Round 58: Ch 1, turn, dc in BLO in 1st st and each sc st around, skipping all fsc, sl st to join. (48 dc)
Round 59: Sc in 1st st and each st around. (48 sc)
Rounds 60-71: Repeat Round 59.
Fasten off.
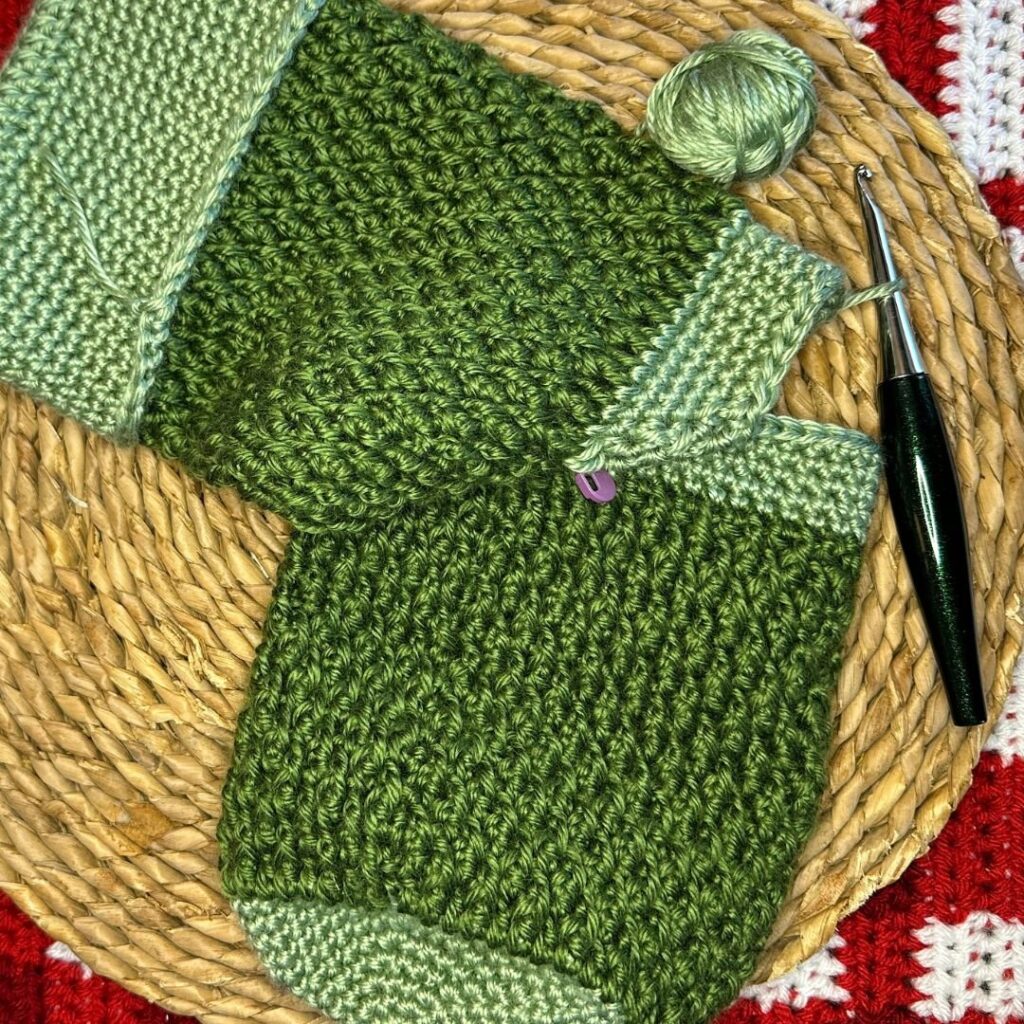
Heel: (Part 4)
Place a stitch marker in each of the 2 corners of the heel.


Join Color A at one corner.
Round 1: ch 1, sc2tog, sc across bottom until 2 sts remain (appx 20 sc), sc2tog x2, sc across top until 2 sts remain, sc2tog.
Round 2: sc2tog, sc across bottom until 2 sts remain, sc2tog x2, sc across top until 2 sts remain, sc2tog.
Rounds 3-9: Repeat Round 2 (decreases by 4 sts each round).
Fasten off leaving a long tail for sewing.
Sew opening closed with long yarn tail.
Weave in all ends
Embellishment:
Create a long chain or i-cord with Color B,
and weave it though dc sts from Round 58.
Attach tassels or pom poms to cord for extra embellishments.


Don’t like the ads?
The complete, ad-free, printable pattern is available for sale on Etsy & Ravelry.
Use coupon code ALPINECAL for 50% off through Monday, December 19th.
The Fine Print
This pattern and its images are the property of Juniper and Oakes ©2023. The pattern is for your personal use only. Please do not copy/paste, distribute, or alter and claim as your own. You may sell products made by this pattern, but please credit @juniperandoakes and remember to link back to juniperandoakes.com or credit Juniper & Oakes on the craft fair tag.
You may post pictures on social media and tag @juniperandoakes and use the hashtags #juniperandoakes and #jaobookmark. If you make this pattern, please email a picture to [email protected] and I will include it in a gallery on my website. You can also post pictures on my Facebook Page, or in the Juniper + Oakes Crochet Community Facebook Group.
This post may contain affiliate links. View our disclosure policy here.
Let me know if you run into a problem. I respond quickly and will help any way I can to clarify any confusion or challenging stitches.


