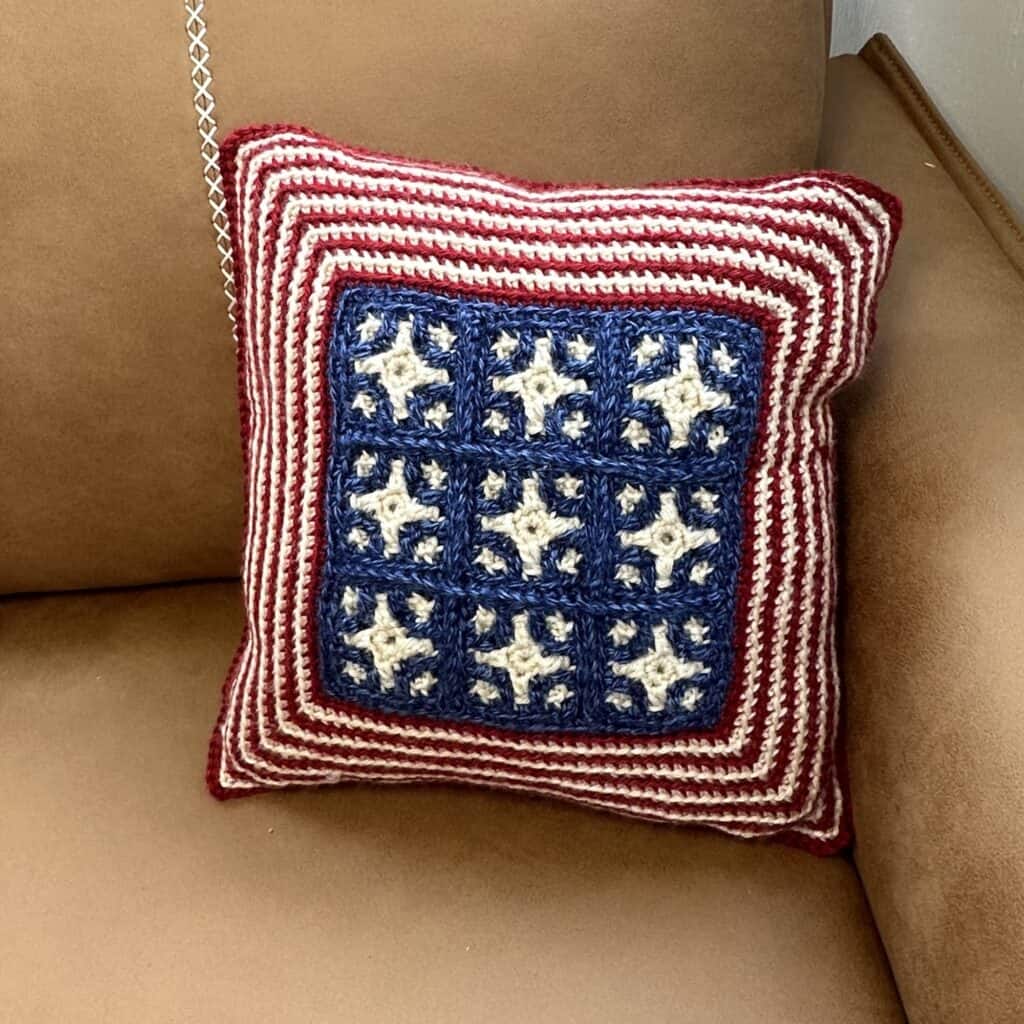
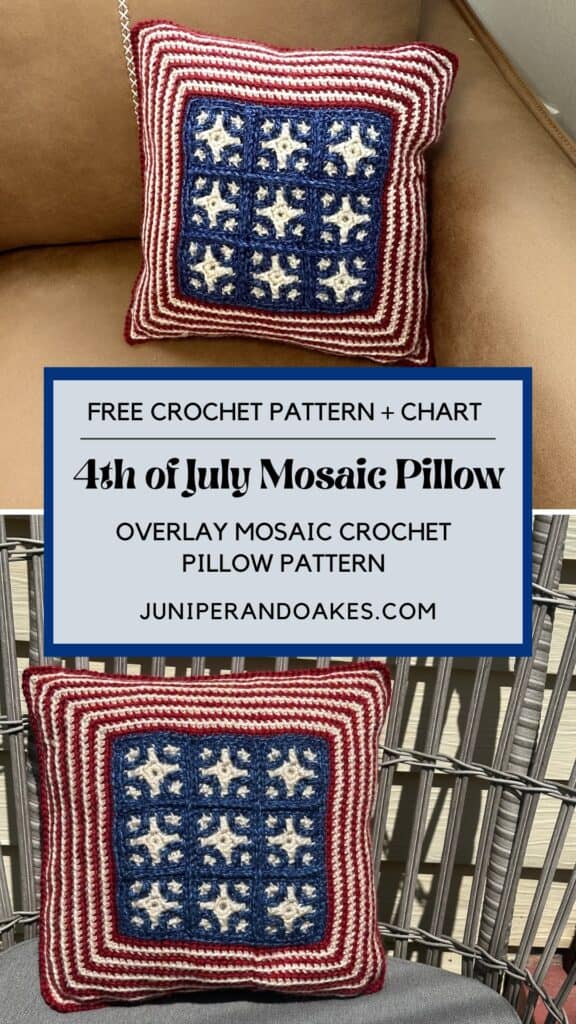
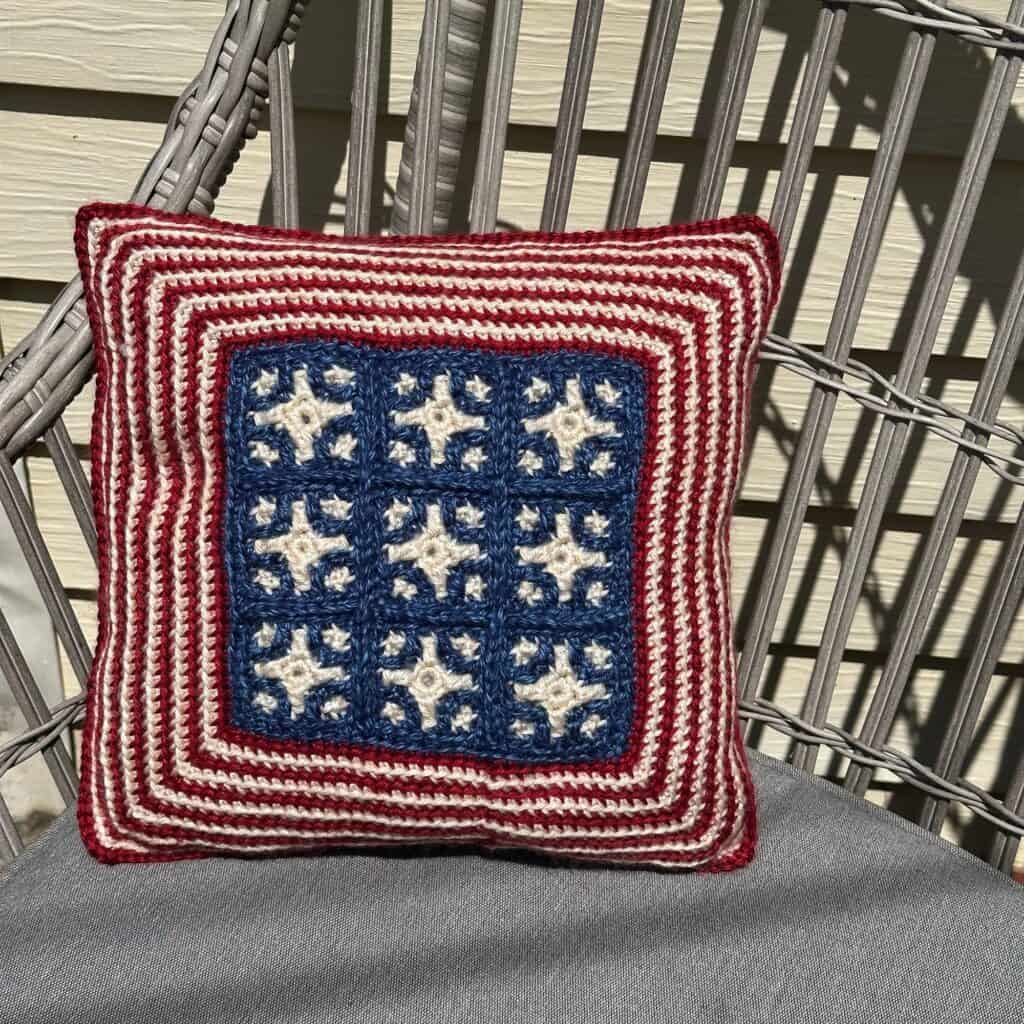
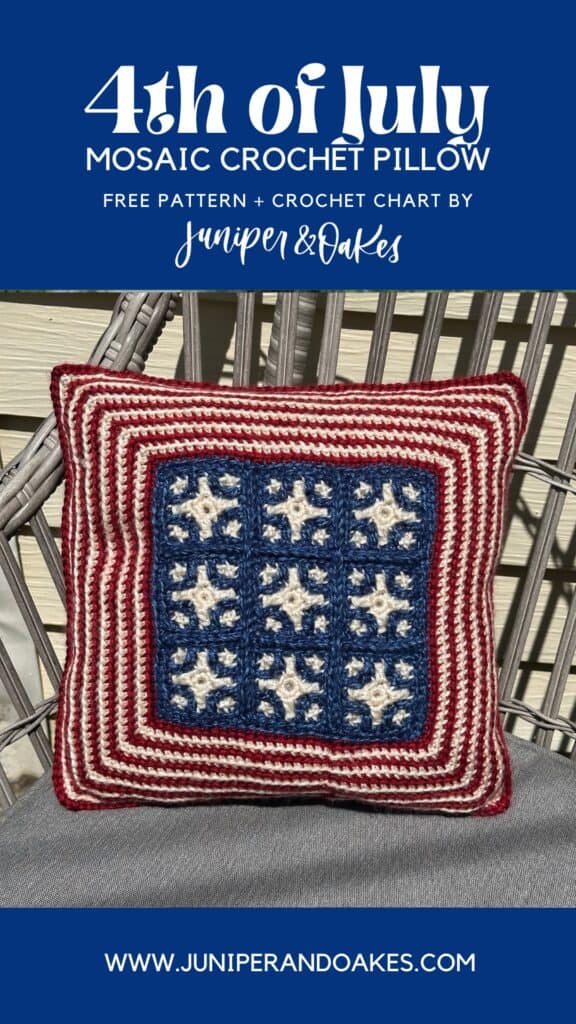
4th of July Mosaic Crochet pillow – Free Pattern
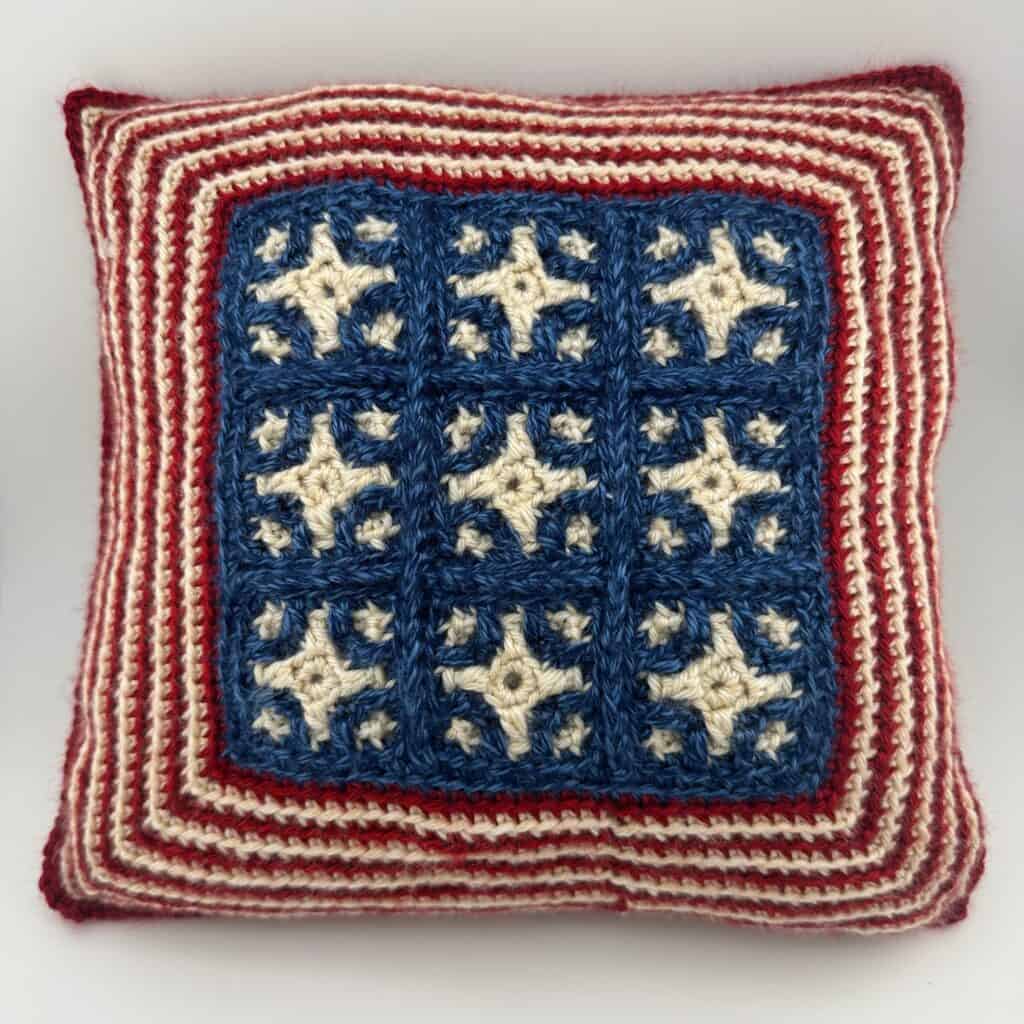
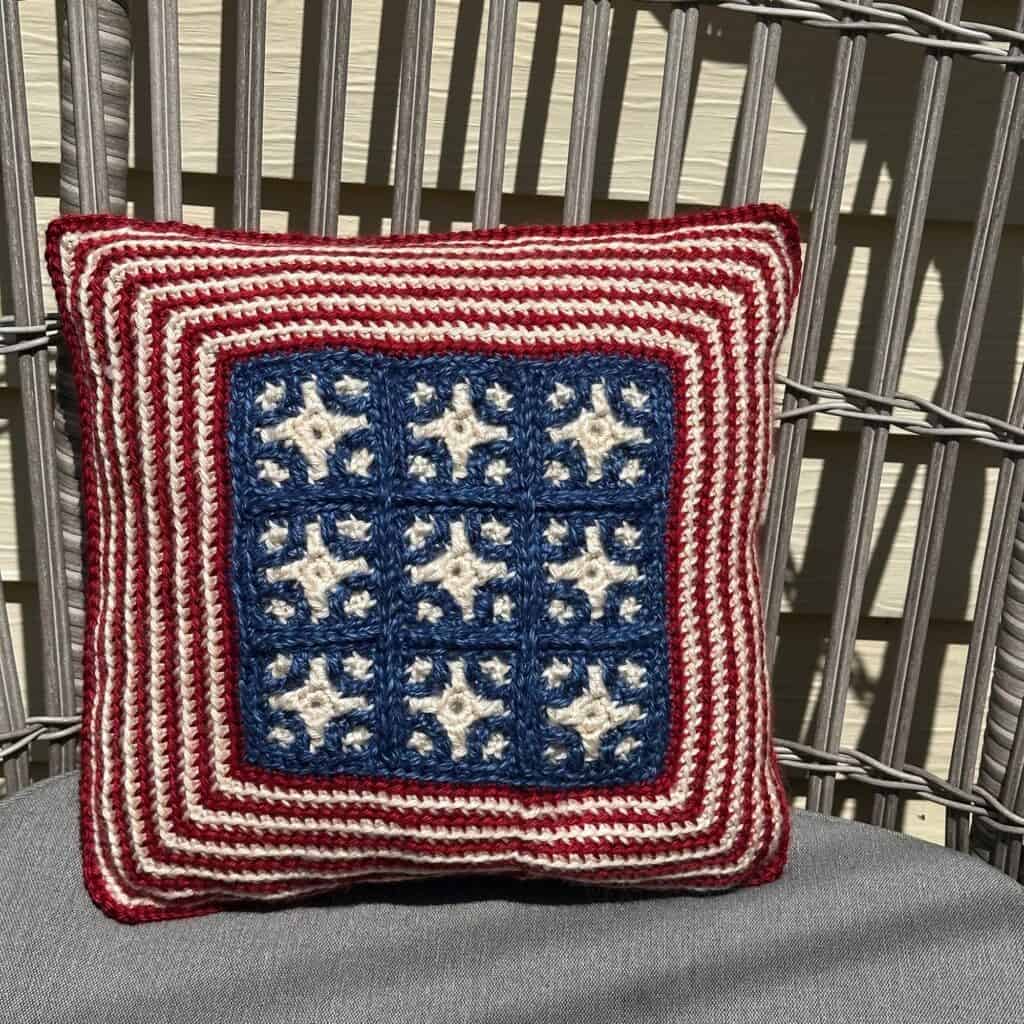
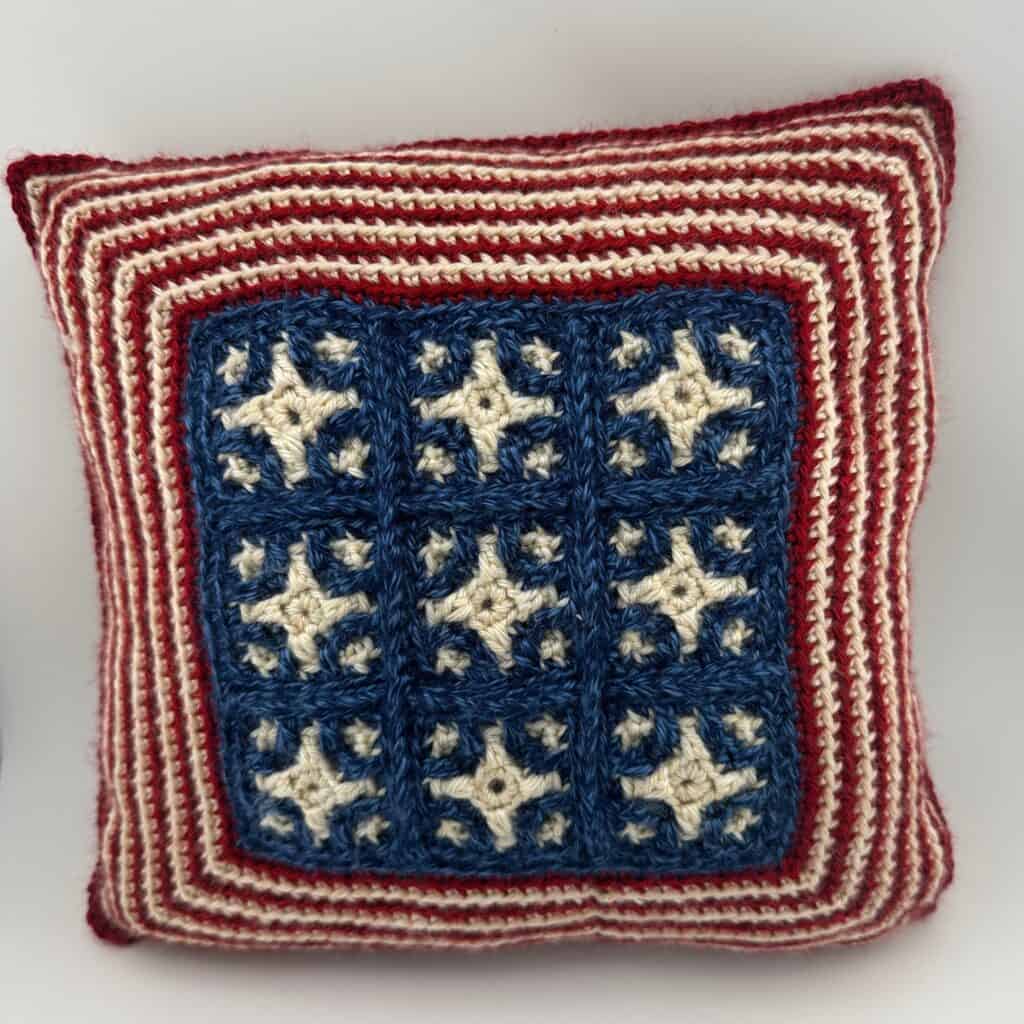
Add a handmade touch to your 4th of July celebrations with this festive mosaic crochet pillow! Nine miniature mosaic crochet starburst squares are framed by bold red and white stripes, creating a design inspired by both the American flag and the sparkle of summer fireworks.
Whether you’re decorating your porch, brightening up a picnic blanket, or adding a patriotic accent to your living room, this cheerful pillow is sure to become a favorite year after year. It’s a fun project to stitch in the weeks leading up to Independence Day—and one you’ll look forward to bringing out for every summer celebration.
At a Glance
- Finished Size: 12” x 12″ square
- Skill Level: Easy
- Technique(s): Overlay mosaic crochet in the round, from the center out
- Yarn: Worsted/medium (#4) weight yarn
- Hook: J/10 (6.00mm), or size to obtain gauge
What You’ll Love About This Pillow
- Cheerful patriotic pillow that’s perfect for summer celebrations
- Easy-to-follow pattern with written instructions, mosaic crochet chart, photos, and video tutorials
- Learn overlay mosaic crochet, plus simple joining and edging techniques
- Beautiful on a porch swing, picnic blanket, or as part of your holiday decor
- Free pattern on the blog, with an ad-free printable PDF available to purchase
A Mosaic Crochet Pillow for the 4th of July
This 12 x 12-inch pillow is worked using overlay mosaic crochet in the round, from the center out. You’ll begin by crocheting nine miniature mosaic squares, then join them into a 3 × 3 grid using a simple back loop only single crochet (BLOsc) seam. Next, you’ll frame the design with rounds of solid BLO single crochet before joining the front and back panels around a pillow form to complete your project.
If overlay mosaic crochet looks a little intimidating at first glance, don’t worry! It quickly becomes intuitive once you settle into the rhythm. The small starburst squares work up fast, and joining them together is a satisfying way to watch the pillow come to life one section at a time.
Because this pillow is worked in the round, you’ll carry the unused yarn up the back of the project as you crochet instead of cutting it after every round. That means fewer ends to weave in and more uninterrupted stitching while the colorful design unfolds.
If you’re brand new to overlay mosaic crochet, I’ve got you covered! Be sure to check out my YouTube tutorial, where I’ll walk you through the technique step by step from the center out.
This post contains affiliate links. While I may receive compensation when you purchase and item from a link, your price doesn’t change and all recommendations are my own. See affiliate disclosure policy.
Don’t have time to make this now? Pin the image below for later.
More 4th of July Crochet Patterns
Yarn Suggestions for the Mosaic Crochet 4th of July Pillow
For this pillow, I used Lion Brand Heartland. This 100% acrylic worsted weight (#4) yarn is inspired by United States national parks, which I think is especially fitting for America’s birthday! It comes in these beautiful heathered shades that gives finished products a rustic look.
If you’d like to make this a stash-busting project, any worsted weight acrylic yarn will do! You just need about 100 yards each of red, white, and blue.
purchase Heartland Yarn here
The Hook
I crocheted this pillow with my J/6.0 mm Streamline Metal hook from Furls Crochet. I find the comfortable shape and polished metal finish especially enjoyable for mosaic crochet, since the stitches flow so smoothly from one to the next.
Furls is also known for its beautiful hook colors, and they’re always adding new ones to the lineup. If you’re in the mood for a little crochet treat, it’s worth seeing what’s new!
Remember, though, that the “best” hook is the one that works for your hands and your tension. Before diving into the full project, I always suggest making a quick gauge swatch with your chosen hook and yarn. It’s a simple step that helps ensure your finished pillow turns out the size you expect.
Purchase A Furls Hook Here
Frequently Asked Questions
Is overlay mosaic crochet beginner-friendly?
Yes! If you’re comfortable with basic crochet stitches like single crochet and double crochet, you should have no trouble learning overlay mosaic crochet. It may look intricate, but the technique is surprisingly approachable once you get started. If you’re brand new to mosaic crochet, or just need a refresher, be sure to check out my overlay mosaic crochet tutorial, where I’ll walk you through the process step by step.
Where can I find the mosaic crochet chart for this pillow?
The free version of this pattern includes complete written instructions right here on the blog. Just keep scrolling to get started! If you prefer working from a mosaic crochet chart, you’ll find one in the ad-free PDF pattern, available from the Juniper & Oakes Shop, Ravelry, or Etsy.
Can I make this crochet pillow for other holidays?
Definitely! While the little starburst squares were inspired by the Fourth of July, this design is easy to customize with different colors. Try festive reds, greens, and golds for Christmas, or use a rainbow of leftover yarn to create a cheerful pillow you can display all year long. The possibilities are endless!
Can I use these mosaic crochet squares in other projects?
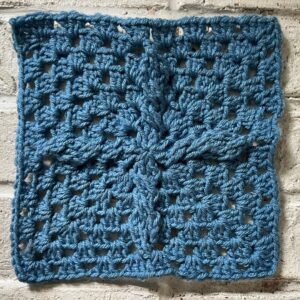
Yes! The different elements of this pattern are fun to mix and match in all kinds of projects. Crochet enough miniature starburst squares for a blanket and border it with the red and white stripes. Turn a single panel into a patriotic wall hanging. Or use the motif as inspiration for your own unique design. I’d love to see the creative ways you make this pattern your own!
Where to Get the Crochet Pattern for the 4th of July Mosaic Pillow
If you make this pattern be sure to post pictures on social media and tag @juniperandoakes and use the hashtag #juniperandoakes. I would love to see your work!
The free pattern written pattern is available below. But if you prefer to work from a mosaic crochet chart, you can find one in the ad-free printable PDF version of this pattern. It’s available for just a few dollars from my shop (you can add it to your Ravelry pattern library from there)! You can also buy the pattern from Ravelry or Etsy, or view it on Gosadi.
Use coupon code JandO250 in the Juniper & Oakes Shop for 50% off Through July 5!
Purchase the Pattern from the Juniper & Oakes Shop
Pattern Details
Skill Level: Advanced Beginner/intermediate
Materials
- Yarn:
- Yarn: Lion Brand Heartland Yarn (100% Acrylic; 251 yds/230 m per 142 g skein)
- White: 100 yards (1 skein)
- Blue: 100 yards (1skein
- Red: 100 yards (1 skein
- Yarn: Lion Brand Heartland Yarn (100% Acrylic; 251 yds/230 m per 142 g skein)
- Hook J/10 – 6.0mm
- Yarn needle
- Scissors
- 12×12 Pillow Insert
Gauge
9 Rounds in 4″ x 4″ square
May change hook size, or add/subtract rounds to meet 12″ square measurement
Finished Measurements
12″ x 12″
Stitches Used and Abbreviations (US Terminology)
- BLOsc – Back Loop Only Single Crochet
- ch – Chain
- FLOdc – Front Loop Only Double Crochet
- mc – Magic Circle
- sc – Single Crochet
- sk – Skip
- sl st – Slip Stitch
- st – Stitch
- sp – Space
Special Stitches
Corner
BLOsc, ch1, BLOsc
Worked together into the BLO of the ch 1 of the corner in the row below.
Back Loop Only Single Crochet (BLOsc)
Insert hook through the back loop of indicated stitch, yo, pull up a loop, yo pull through both loops on hook.

Front Loop Only Double Crochet (FLOdc)
Yo, insert hook through the front loop of the stitch 2 rows below, yo, pull up a loop, yo, pull through two loops on hook, yo, pull through remaining loops.

Invisible Join
Work last stitch, Remove hook from loop, Insert hook through back of 1st stitch of row, Grab dropped loop, Pull yarn loop though. (May also use sl st to join.) Click here for a video tutorial.

Carrying Unused Yarn
At the beginning of each round:
- Carry the unworked yarn under the first BLOsc of the corner.
- Drop the unused yarn to the wrong side before continuing.
This keeps color changes clean and secure.
Pattern Notes
- Pattern is overlay mosaic crochet worked in the round from the center out. Watch this video to learn more about how to mosaic crochet from the center out. *Note: This video demonstrates the technique on another pattern but the basics are the same.
- Ch 1 at the beginning of each round does NOT count as a stitch.
- Stitches between *asterisks* are repeated on each side of the square.
- Each round (except Round 1) begins with the corner stitches.
- Corner stitches (BLOsc, ch 1, BLOsc) are worked into the BLO of the ch-1 corner below.
- Carry unused yarn under the first BLOsc of each corner, then drop it to the wrong side.
- Work an invisible join after each round.
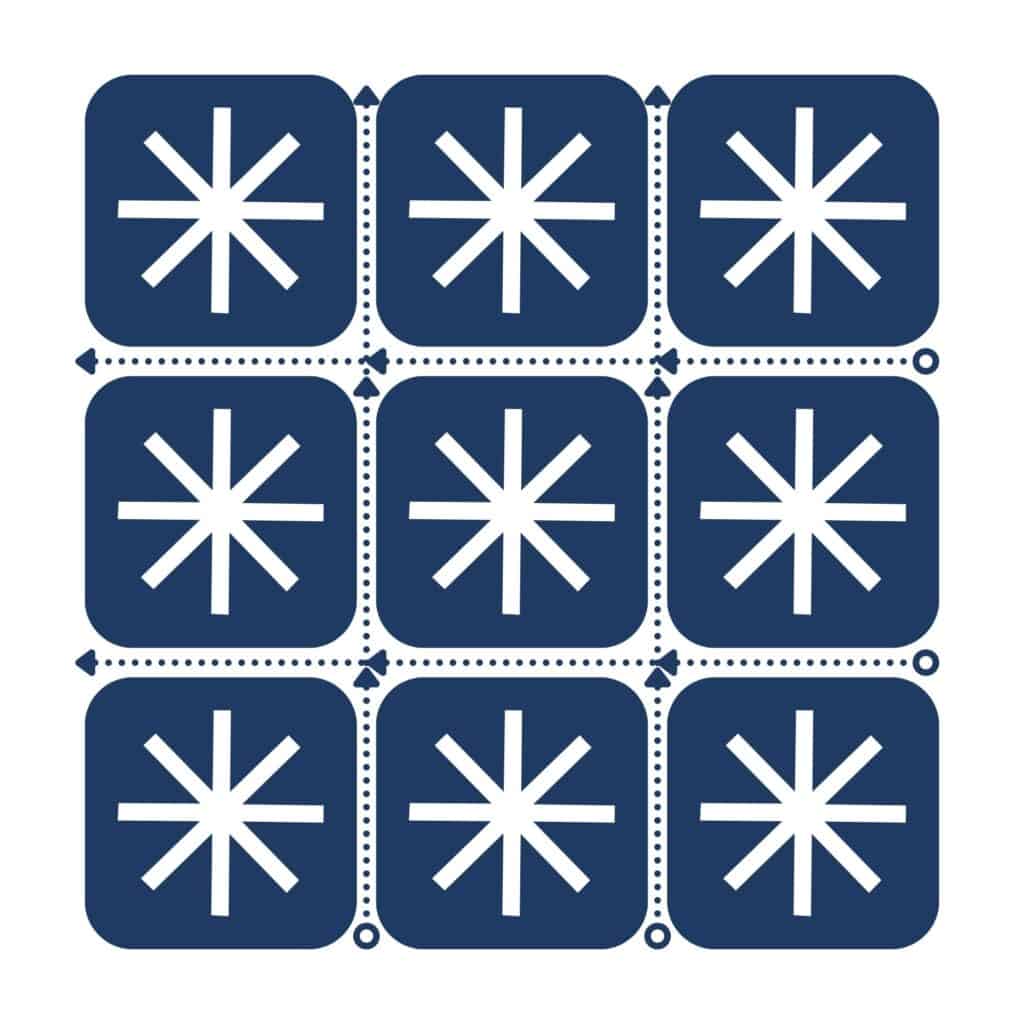
- The 12″ panel is made of 9 smaller mosaic squares seamed in a 3×3 grid.
- If your tension runs loose, try going down a hook size or using a light worsted weight.
- Make 2 panels total (18 squares).
- A chart for the pattern can be found in the premium pattern.
Written pattern for 4th of July Mosaic Pillow
Instructions
🌟Make 18🌟
After each round, work an invisible join.
Round 1: With White, make a mc, ch 1, 8 sc in mc.
Round 2: With Blue, ch 1, *Corner (see Special Stitches), BLOsc, repeat from * around.
Round 3: With White, ch 1, *Corner, BLOsc x1, FLOdc x1, BLOsc x1, repeat from * around.
Round 4: With Blue ch 1, around.*Corner, BLOsc, FLOdc, BLOsc, FLOdc, BLOsc, repeat from * around.
Joining 9 Squares into a 3×3 Panel
(Make 2) – Refer to graphic
Click here for video tutorial.
- Hold two squares with wrong sides together.
- Make a slip knot with Blue and place it on hook.
- Insert hook through the BLO of the corner chain of the front square, then through the matching BLO of the corner stitch of the back square.
- Work a sc through both loops: yarn over, pull through both back loops (3 loops on hook), yarn over, pull through all 3 loops.
- Continue working BLOsc through both back loops across the entire edge.
- Continue seaming, adding the next two squares in the same manner, until 6 squares are seamed together.
- When 6 squares are seamed together, use this method to add a third row, so there are 9 squares seamed together. Fasten off.
- Seam the squares together horizontally in a similar manner.
Adding Stripes
Click here for video tutorial.
Round 1: With Red, attach yarn in any corner ch. Ch 1, *Corner and BLOsc across, repeat from * around. Invisible join.
Round 2: With White, ch 1, *Corner and BLOsc across, repeat from * around. Invisible join.
Rounds 3-12: Repeat Round 2, alternating between Red and White.
Fasten off.
Assembling Pillow
1. Position the Panels
- Hold wrong sides of both panels together.
- Ensure all four corners and edges are lined up neatly before you begin.
2. Seam Three Sides
- Attach Red with a slip knot at any corner.
- Work a Corner through the back loops of both panels in the corner ch.
- Work BLOsc through the matching back loops of both panels across the entire first side.
- At the next corner, work a Corner stitch (BLOsc, ch 1, BLOsc) through both panels.
- Continue across the second side with BLOsc.
- Work a Corner stitch at the third corner, then BLOsc across the third side.
- Stop at the final corner. DO NOT fasten off yet.
3. Insert the Pillow
- Open the unseamed side and insert the 12″ × 12″ pillow form.
- Adjust the corners of the pillow form so they sit neatly inside the pillow.
4. Close the Final Side
Pick up where you left off (at the fourth corner).
- Work a Corner stitch through both panels at the fourth corner.
- BLOsc across the final side, matching stitches on both panels.
- At the starting corner, Invisible join.
- Fasten off.
- Weave in ends.
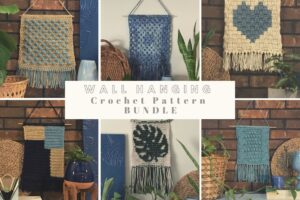
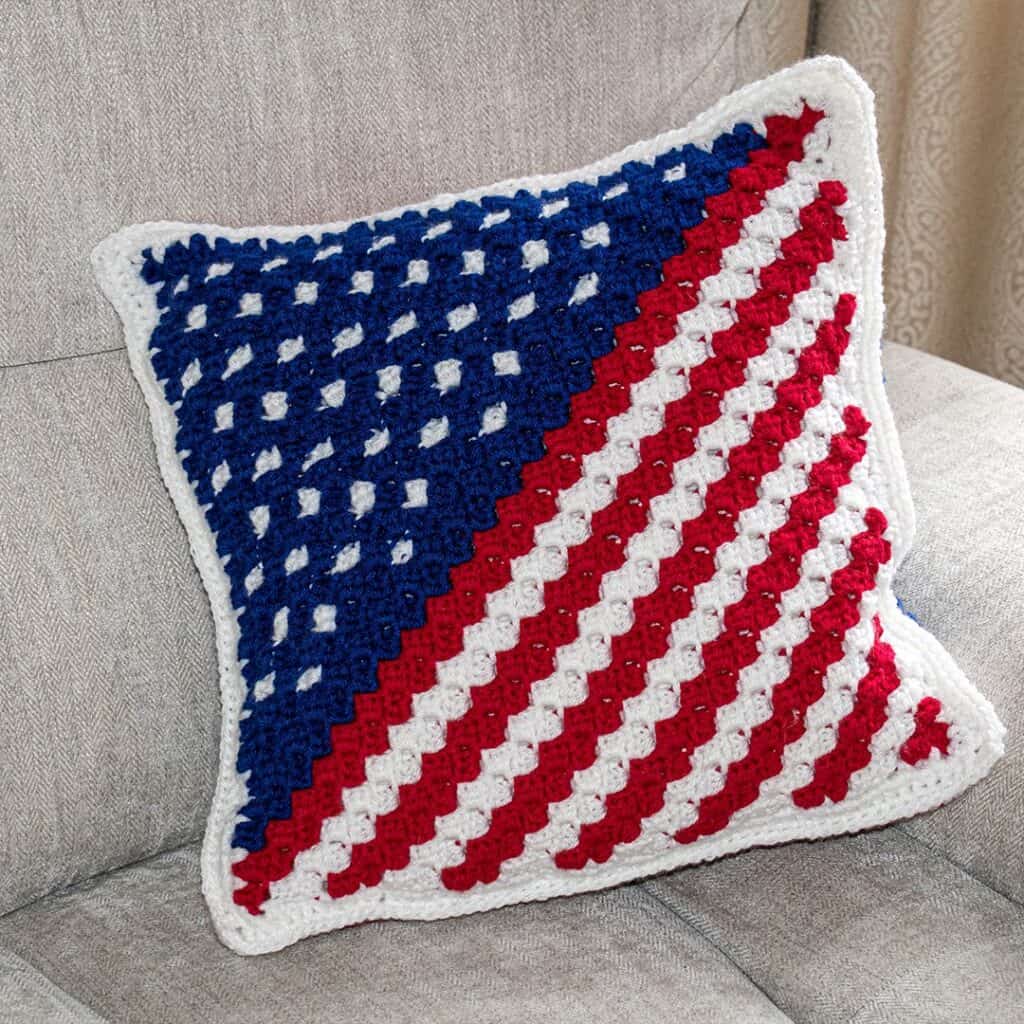
More Crochet Pillow Patterns
If you love making pillows, you may also enjoy trying different crochet stitches and techniques with these other crochet pillow patterns:
- Peaks and Pillars Pillow – another mosaic crochet design
- Velvet Georgia Pillow – full of crochet cables and bobble stitches
- Griffin Pillow – using the Celtic weave stitch
- Cabled Granny Pillow – a fun twist on the classic granny square using blanket yarn
- Granny’s Four Square Pillow – made of classic granny squares
- Desert Flower Pillow – with a jasmine stitch accent
- Rain-Boho Pillow – with granny circle center
- Heart in a Basket Pillow – with a heart design in basketweave stitch
- Daffodil, Autumn Leaf, and Pumpkin Pillows – all worked in C2C crochet
The Fine Print
This pattern and its images are the property of Juniper and Oakes ©2026. The pattern is for your personal use only. Please do not copy/paste, distribute, or alter and claim as your own. You may sell products made by this pattern, but please credit @juniperandoakes.
Please post pictures on social media and tag @juniperandoakes and use the hashtag #juniperandoakes. You can also post pictures in the Juniper + Oakes Crochet Community Facebook Page.
Let me know if you run into a problem. I respond quickly and will help any way I can to clarify any confusion or challenging stitches.